Restaurant POS: Table Layout And Kitchen Display Management
This feature is available as a free add-on with Hike's Plus plan, which must be activated before use. Once enabled, you can also synchronize the layout across all registers by turning on Table Layout Sync, ensuring your setup is backed up to the cloud.
This feature will be available on Web, iPad, and Android apps at the same time.
Activate the Add-on Plan
To enable Table Layout:
- Go to Store setup > Add-ons.
- Activate the Restaurant Table Layout.
Floors:
The Table Layout feature in Hike POS allows you to design a digital floor plan of your restaurant, café, or bar. With this feature, you can:
- Create customized floor plans.
- Arrange tables and seats to match your actual restaurant layout.
- Start and manage orders directly from the table view.
1. Create a Floor Plan
Once the add-on is active, you can start creating your floor plan:
I. Navigate to Point of Sale > Table layout > Floor > Add floors.

II. Add details for your floor:
- Name of the floor (e.g., Ground Floor, First Floor, etc).
- Number of tables on that floor.
III. You can customize table names (e.g., “Seating Area,” “Sofa,” etc.).
IV. Save your floor plan.
You can create up to two floors in each outlet if needed, each with its own unique floor plan.
2. Arrange Tables in the Floor Plan
After creating a floor plan, arrange the tables visually to reflect your actual setup:
I. Click on the Gear icon next to the floor plan.

II. A map of your floor will appear.
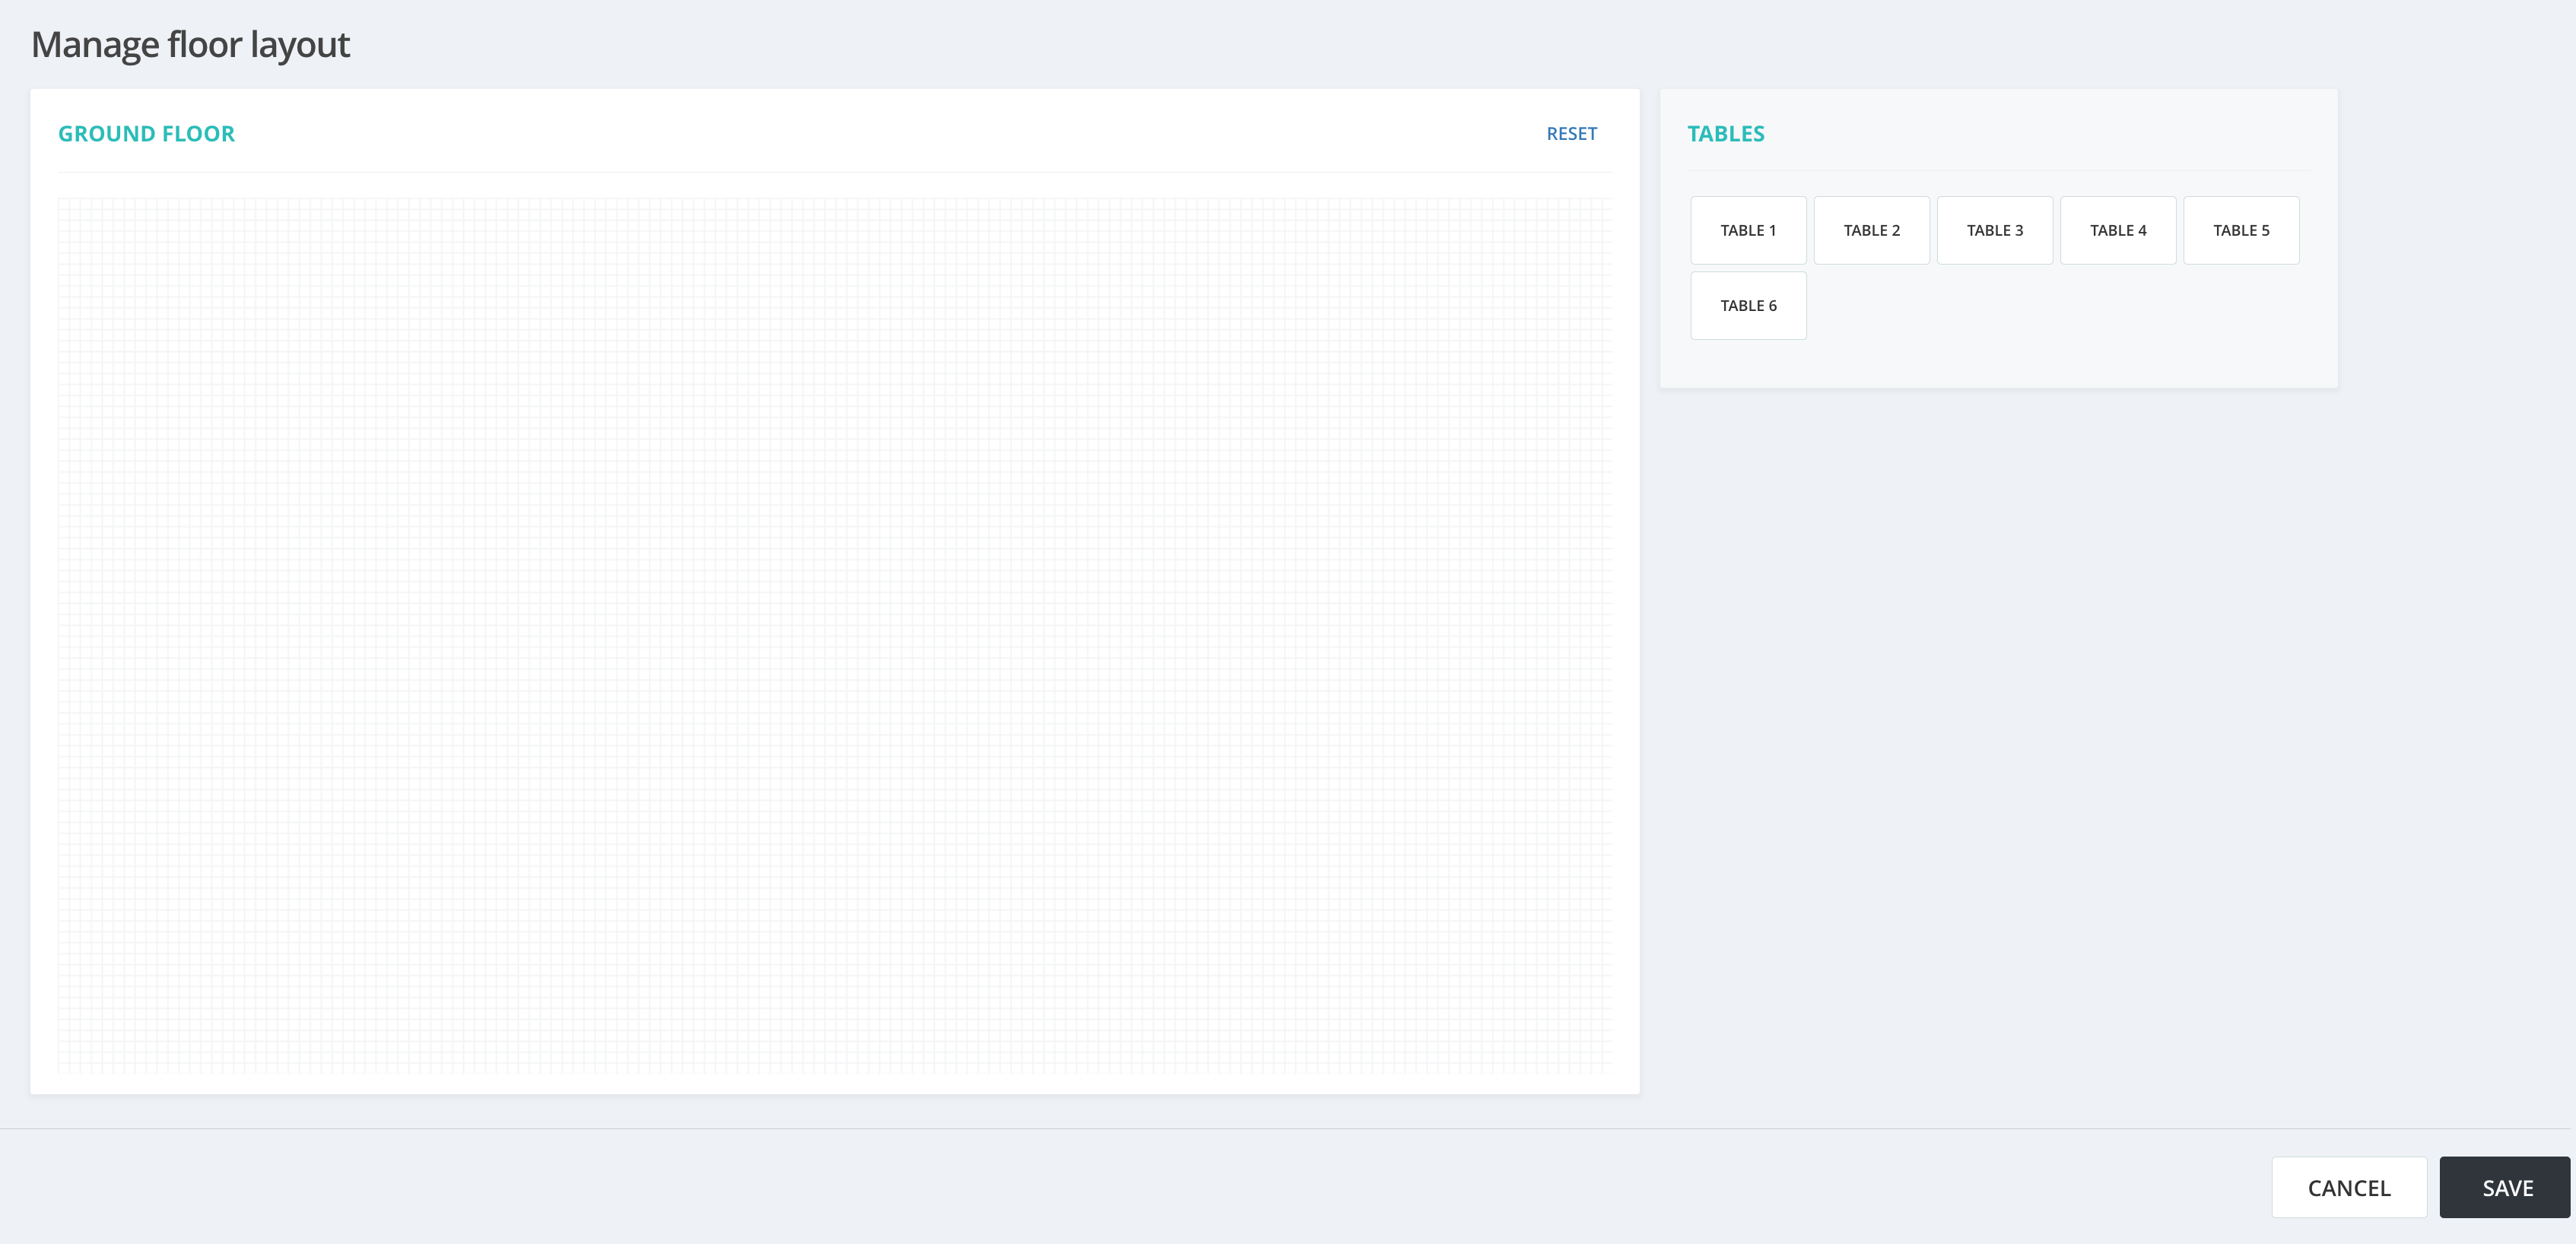
III. Select the table numbers and drag them into place on the map.
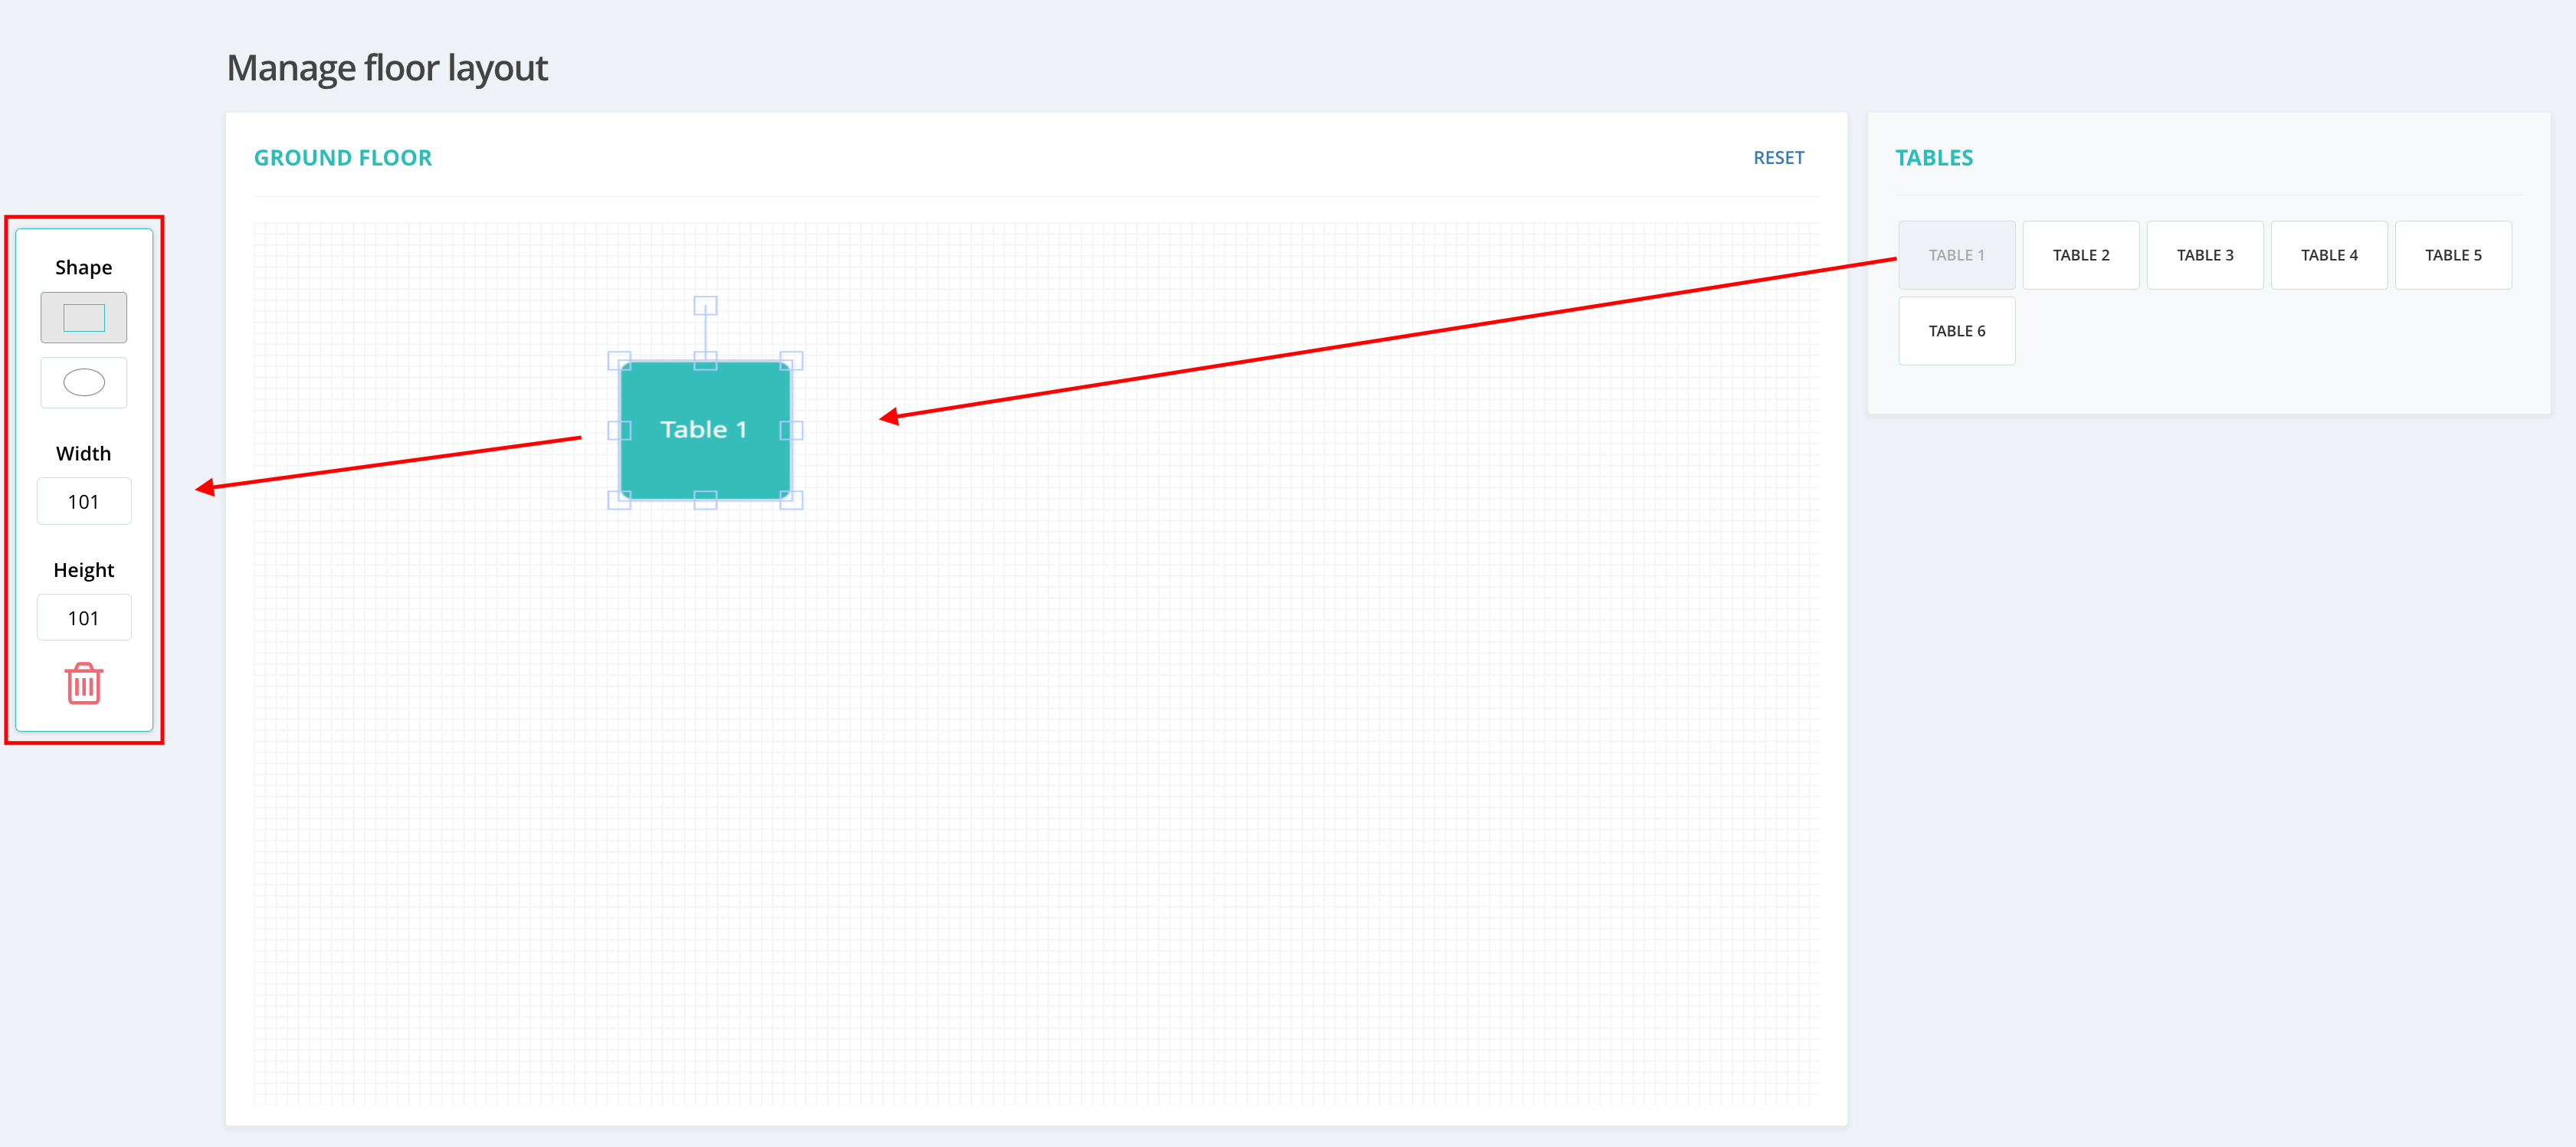
IV. Customize tables further by adjusting:
- Size.
- Shape (square and circular).
V. Save the layout once finished.
3. Placing Orders Using Table Layout
With the floor plan ready, you can begin placing orders from tables:
I. Go to Point of Sale > Process sales.
II. Click the table icon (next to the cash register number).
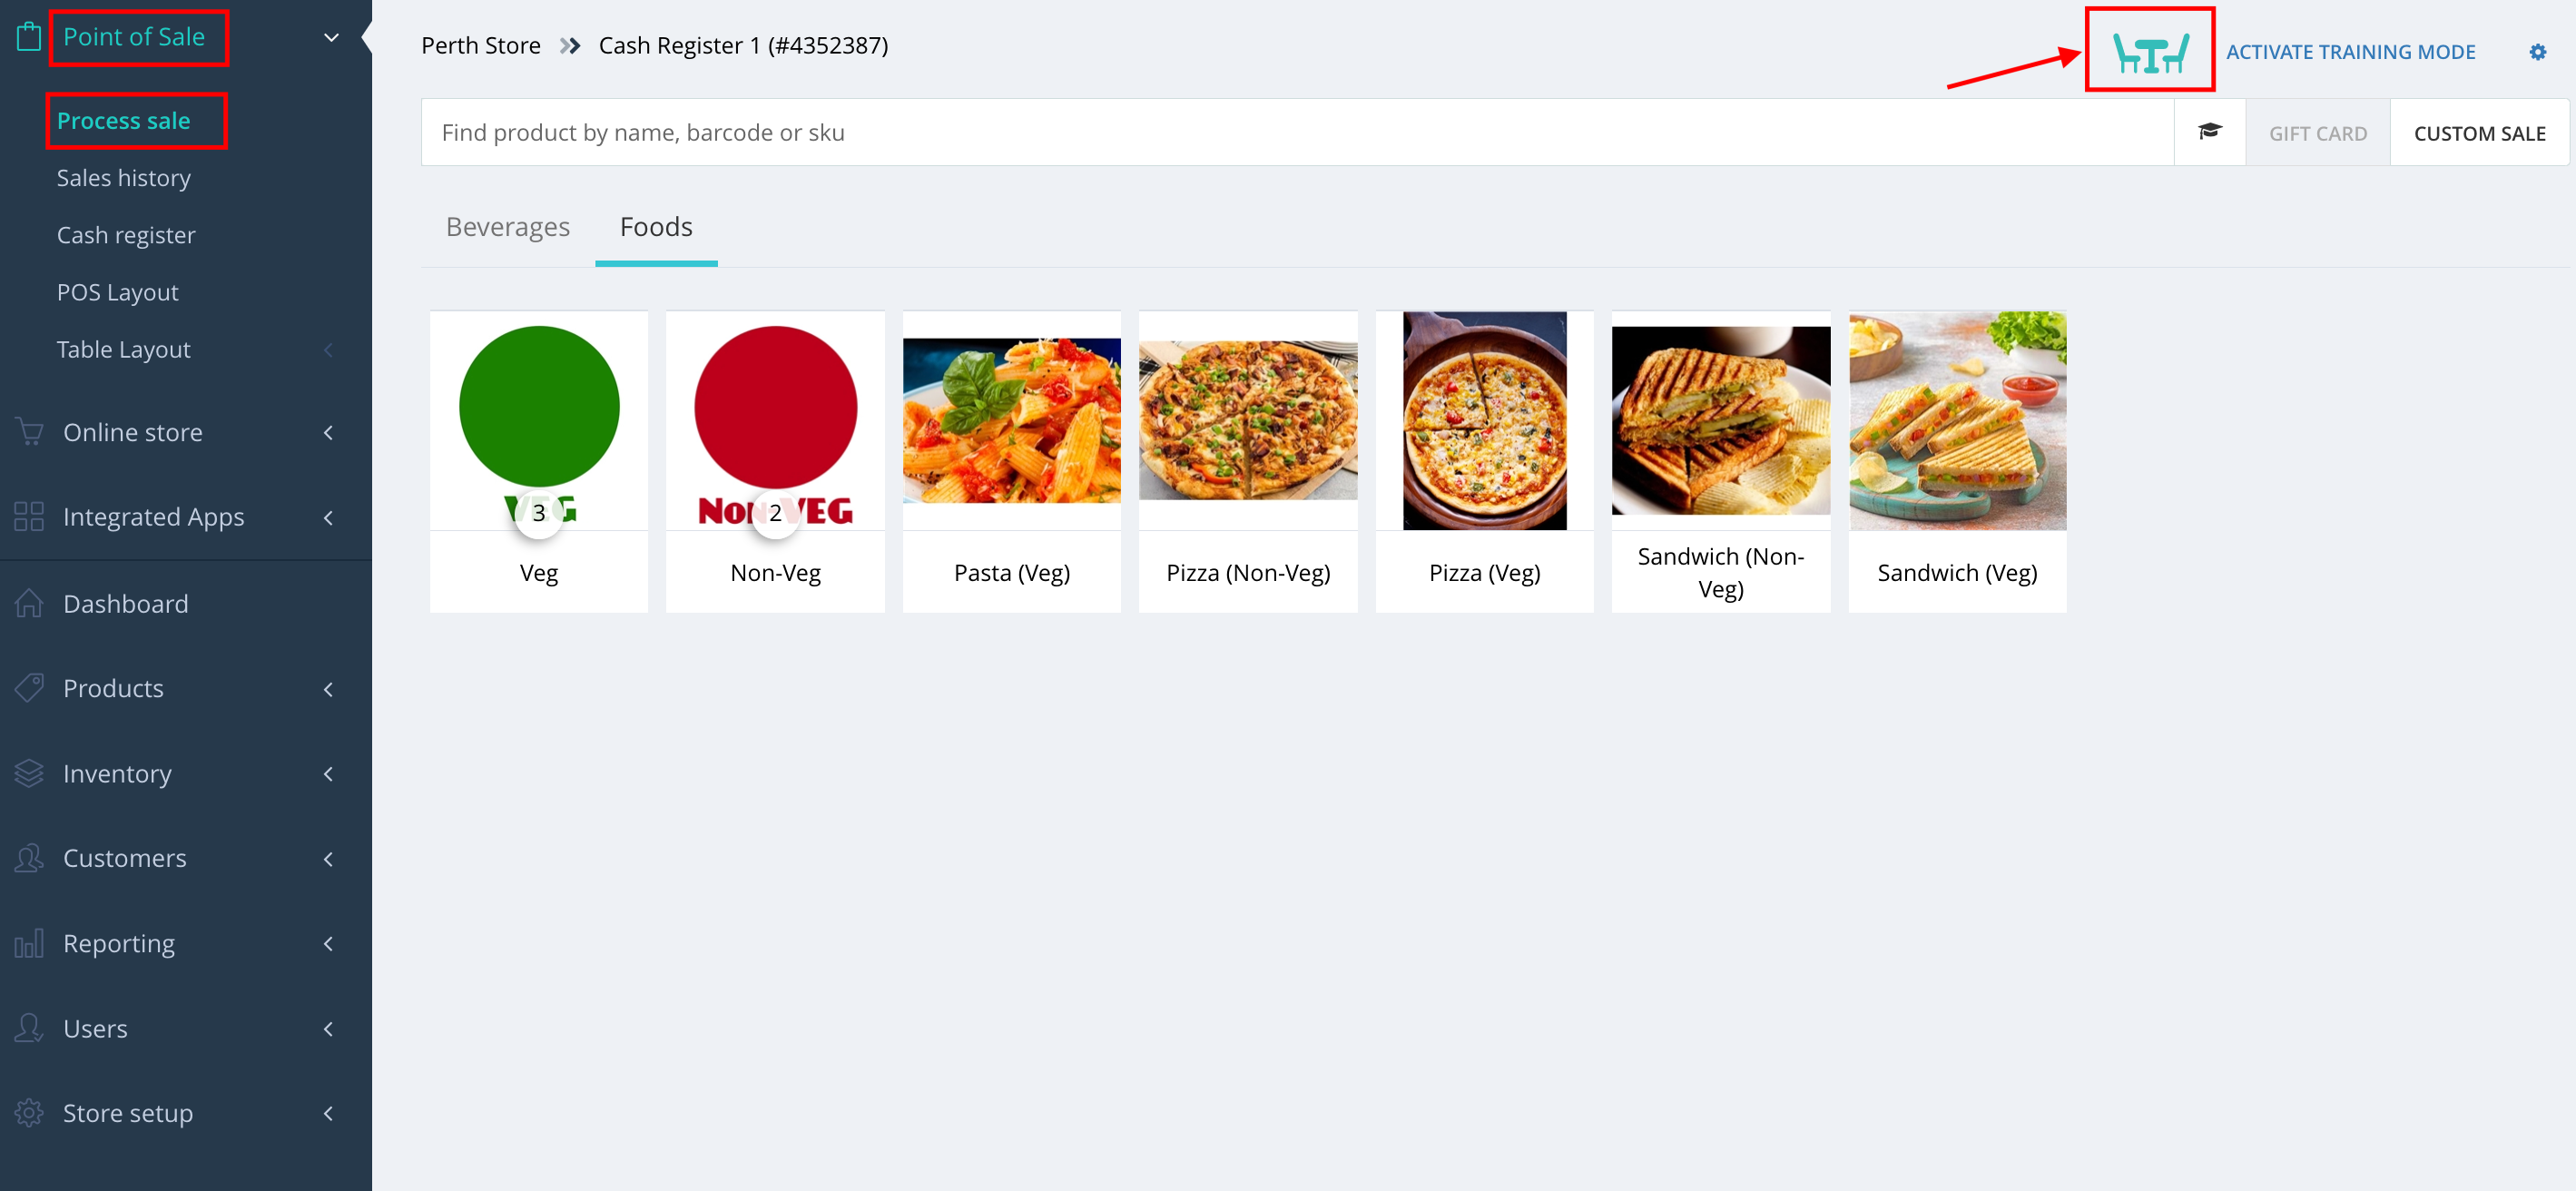
III. The floor map will display table availability as follows:
- Green tables represent available ones
- Red tables represent occupied ones
IV. Select a table to open it.
Start by selecting a table from the floor map. Simply click on the table you wish to manage. This will open the order screen for that specific table, allowing you to begin the ordering process.
V. Add items to the cart and click ORDER to send the order to the kitchen.
Once the table is open:
- Browse the available menu categories and select the desired items.
- Each item you select will appear in the cart, where you can adjust quantities or remove items if needed.
- After reviewing the order, click the ORDER button.
- The order will then be sent directly to the kitchen for preparation.
- You can continue to manage the table, add more items, or close the table once the service is complete.
(You will learn more about Kitchen Display later in this support article below.)
4. Completing Orders
We have introduced a new sales status, i.e., "Ongoing". This status has been introduced for the sales that are open for the table, and users can add and remove the products before completing them.
When customers are ready to pay:
You can open the order in two ways:
- Option 1: Go to Point of Sale > Process sale, click the table icon, then select the table.
- Option 2: Go to Point of Sale > Sales history, search for the sale, reopen it, and add it to the cart.
Once the order is open:
- Click PAY.
- Choose the customer’s preferred payment method to complete the transaction.
Important:
1. If you wish to allow refunds or exchanges for restaurant orders, enable the option below via: Store setup > General > Activate refund and exchange for restaurant orders.
Please note: This option is available only for the Super Admin user.
2. The following features are disabled because you are currently using an add-on: Restaurant Table Layout.

Kitchen Display:
The Kitchen Display feature works seamlessly with the Table Layout to simplify and streamline order management. Its main purpose is to display order details from the POS system directly on the kitchen screen, ensuring smooth communication between the front of house and the kitchen. This allows kitchen staff to view orders in real time and prepare dishes accordingly.
- When an order is placed, it is automatically sent to the kitchen screen.
- Kitchen staff can update the status of each order as it progresses:
- To Cook
- Ready
- Completed
- Done
This ensures smooth communication between the front of the restaurant and the kitchen, reducing delays and errors.
1. Create Kitchen Display
To create a kitchen display:
I. Navigate to Point of Sale > Table layout > Kitchen Display > Add Kitchen Display.

II. Add name of the Kitchen (e.g., Veg Kitchen, Non-Veg Kitchen, etc).
III. Assign Product Types for each Kitchen.
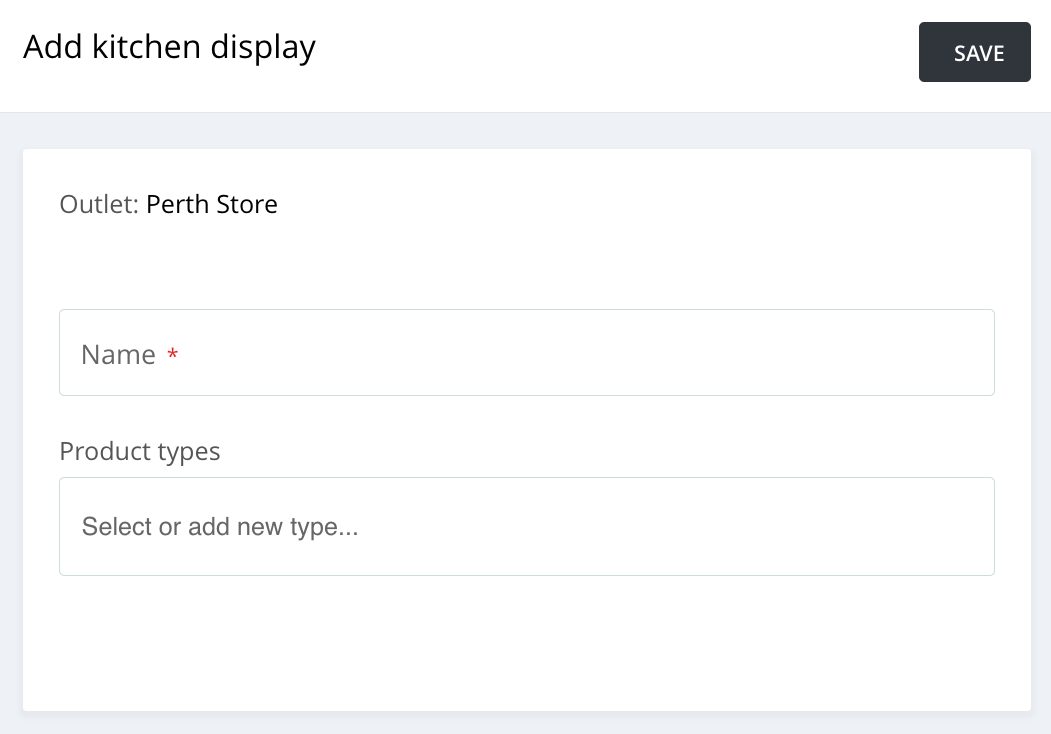
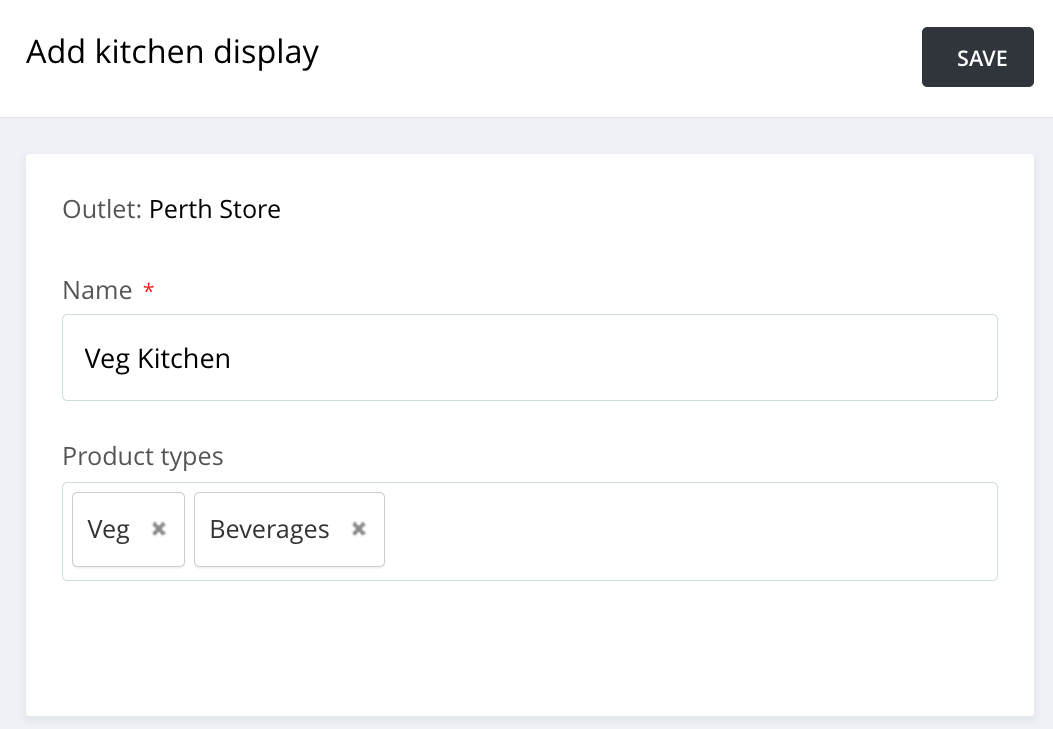
IV. Save your Kitchen Display.
You can create multiple kitchen displays in each outlet if needed, each with its own assigned product types.
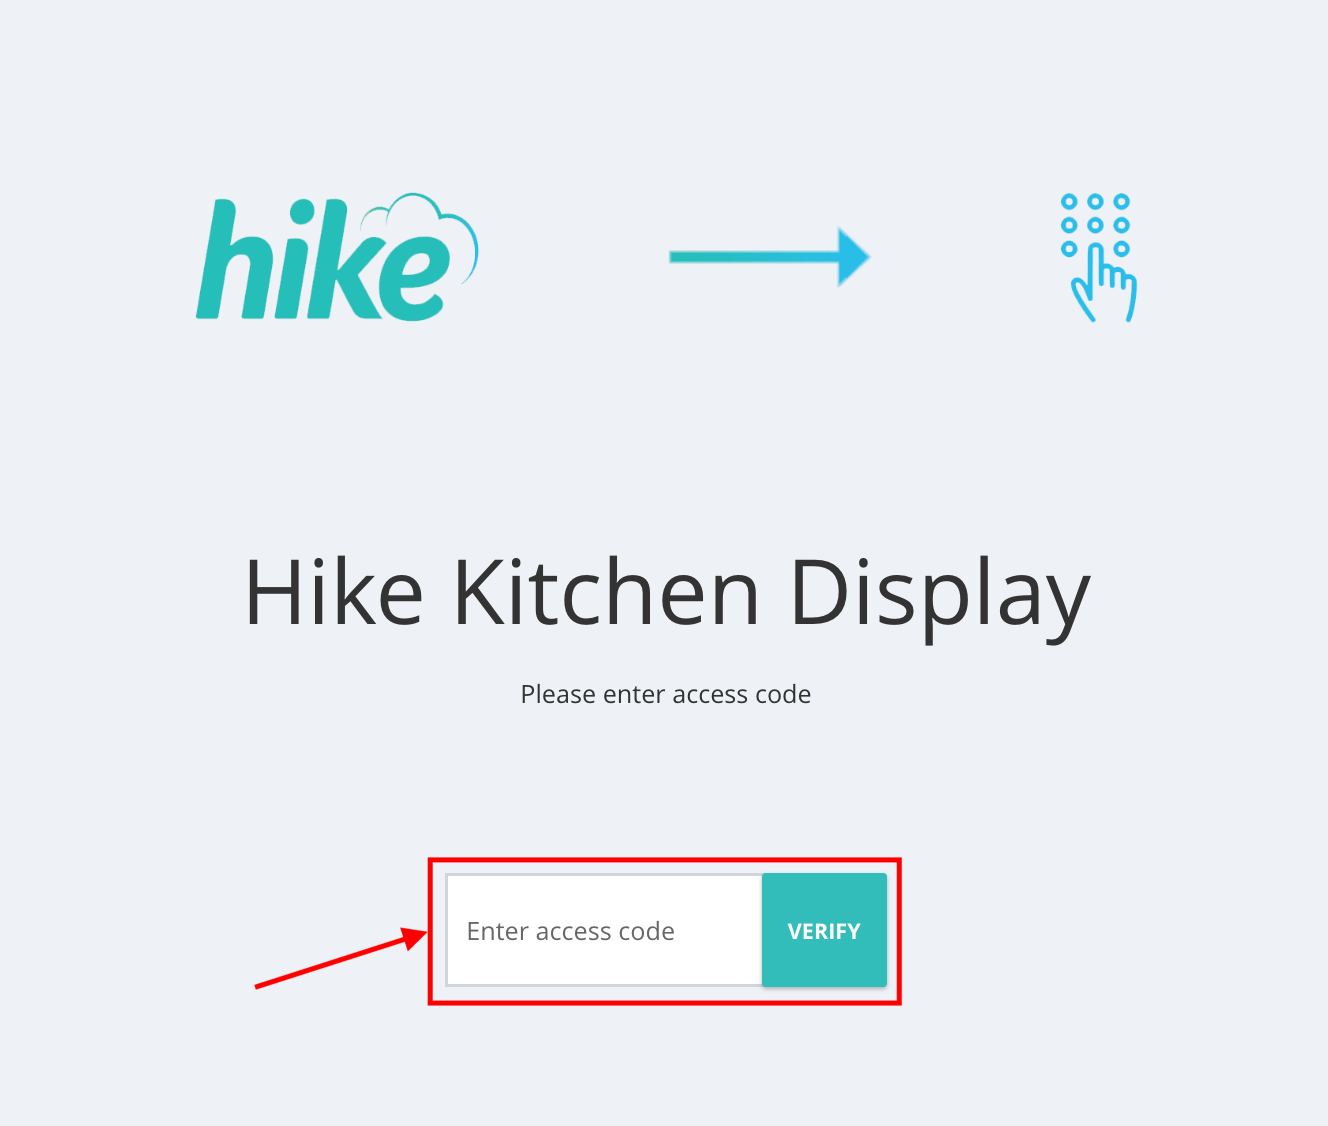
2. Set up Kitchen Display screen
To set up the kitchen display screen in your kitchen and learn how it works, you will need to open the kitchen display URL on the device that is available in the kitchen to streamline order management.
I. Go to Point of Sale > Table Layout > Kitchen Display screen.
II. Copy the Kitchen Display URL and Access Code, and share it with the device in the kitchen.

III. Open that link in the kitchen device and enter that code to open the Kitchen Display interface.
3. How Kitchen Display interface works
Once the kitchen display interface is opened on your device, you will see the list of orders placed in front of the restaurants as follows. The items will be displayed in the particular kitchen display screen in which that specific product type is assigned. For eg, if your customer orders a non-veg pizza, and if the product type "Non-Veg" is assigned to the Kitchen-2, then the order will be displayed in the Kitchen-2 screen, and not the other kitchen display screen.
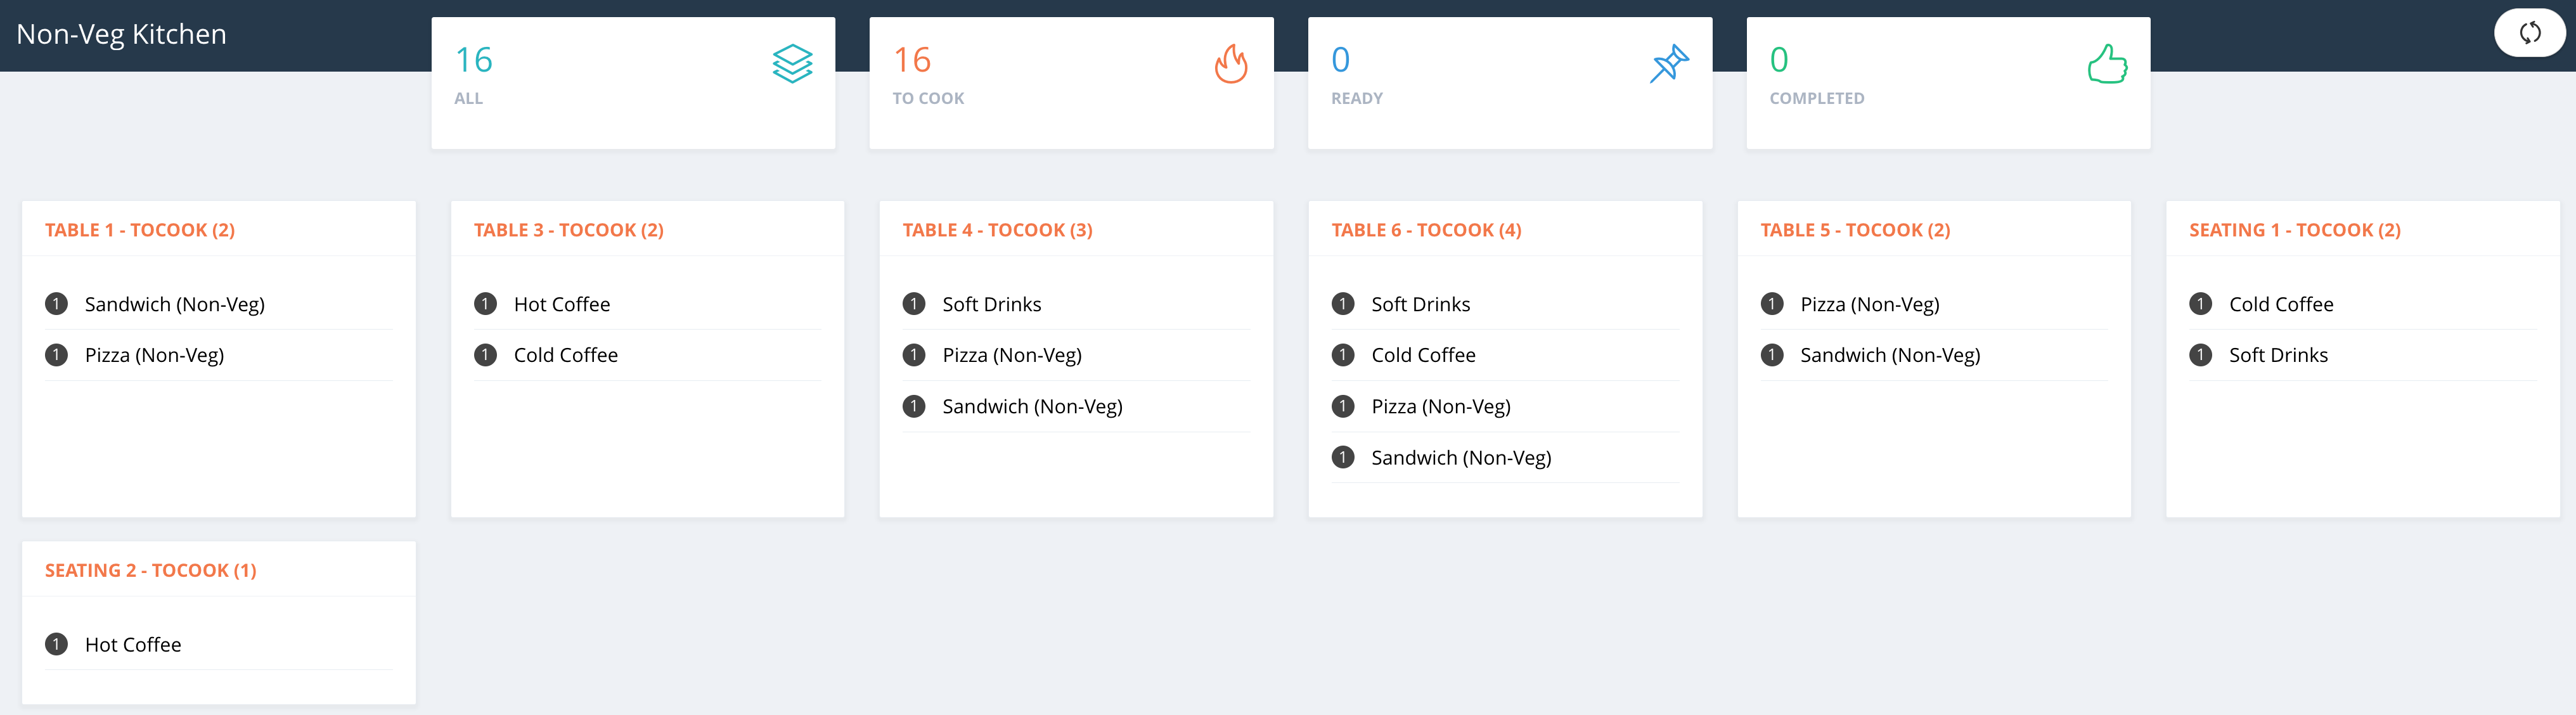
The orders will be bifurcated into four different categories as follows:
I. All: In this category, you will see all the orders received and the progress of the orders as well.

II. To Cook: In this category, you will only see the orders that need to be cooked yet. As soon as the item in the order is prepared, you can click on that item, which will move to the “Ready” category.
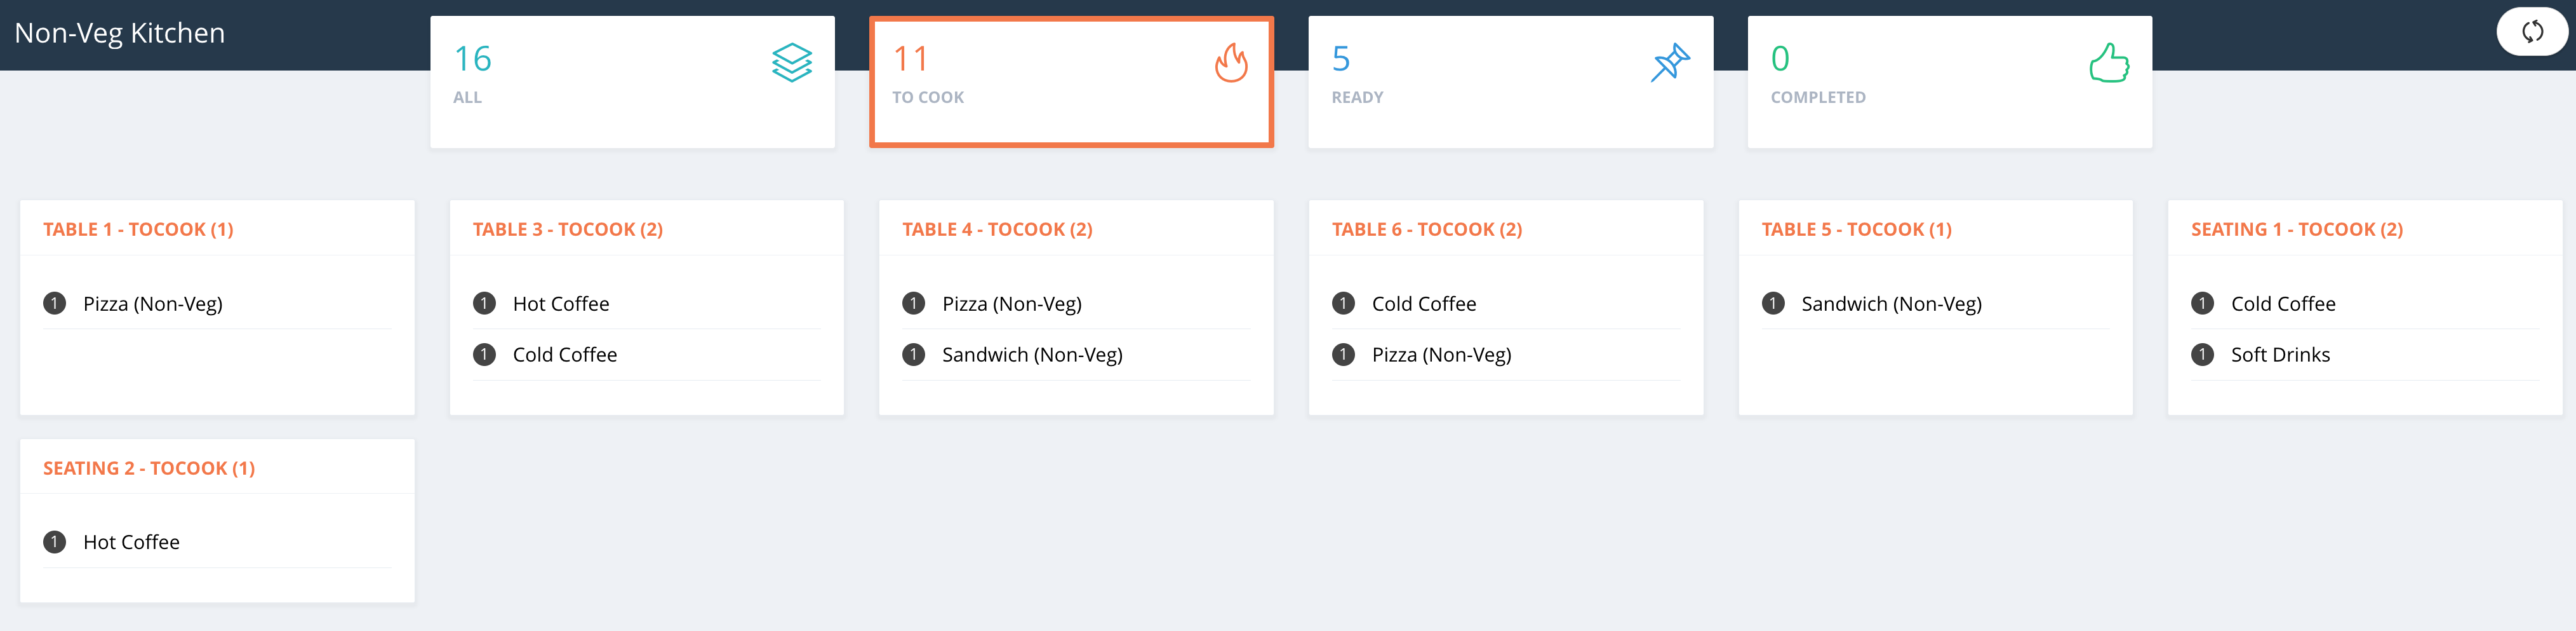
III. Ready: Once the items in the order are ready, you can click on that item. As soon as you click on the item, it will move to the “Completed” category.

IV. Completed: Once all items in the order are prepared, you can click on “Done” to finish the order. Or, if you wish to undo it, then you can click on “Cook again”, which will send the order back to the “To Cook” category.
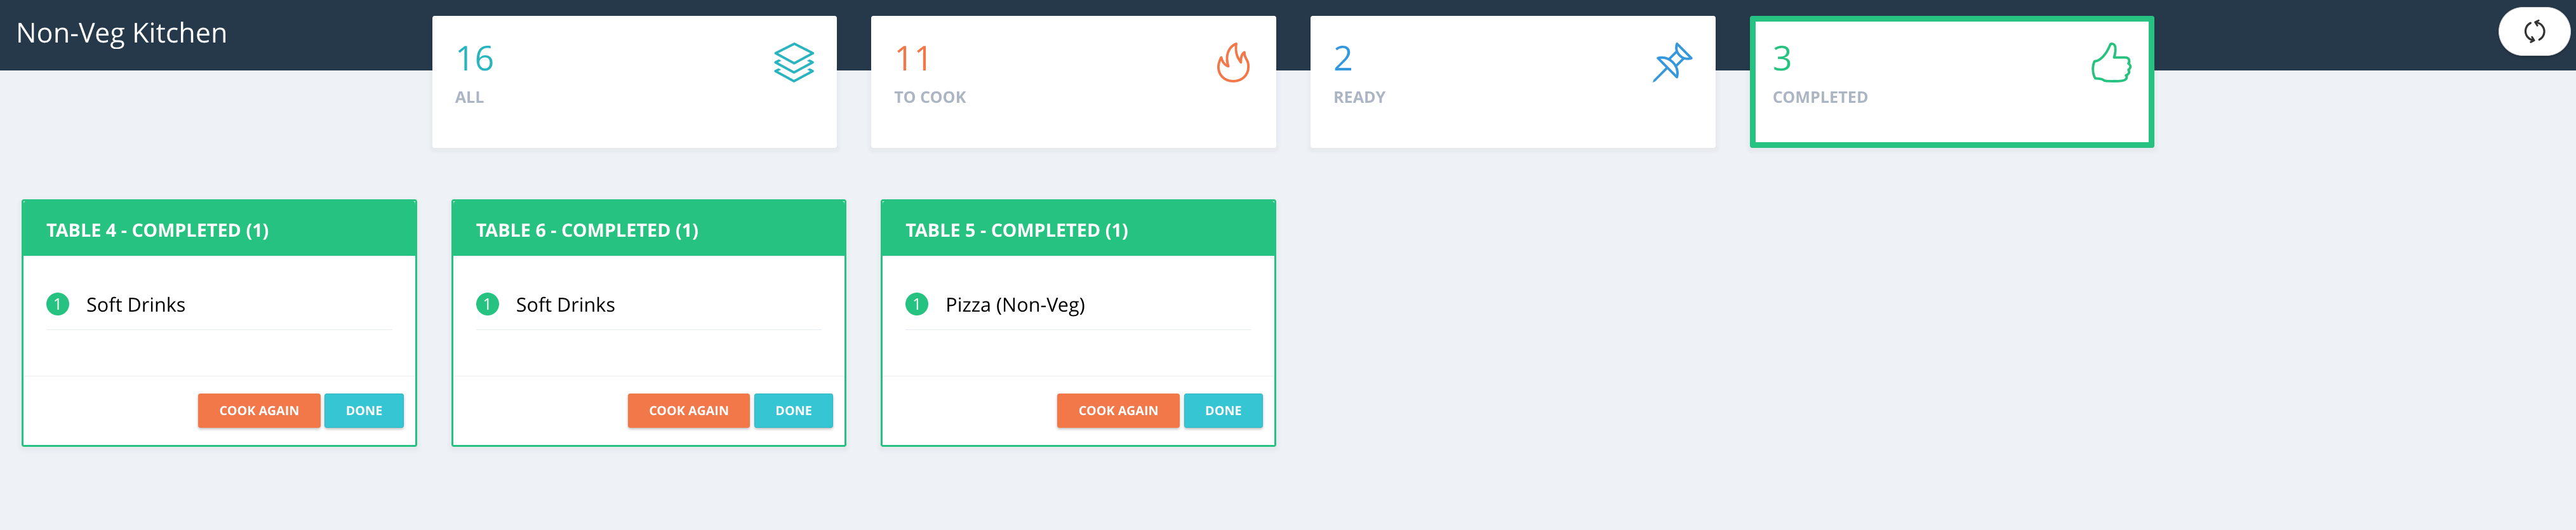
V. Done: When the item is prepared, it will show under the Completed category. You can click on "Done" to remove the item from the kitchen display screen.
V. Done: When the item is prepared, it will show under the Completed category. You can click on "Done" to remove the item from the kitchen display screen.
For iPad and Android tablets:
If you are using Hike POS on an iPad or an Android tablet, and you wish to use the Restaurant Table Layout feature, then you can create the Floors and Kitchen Displays from PC/Web as guided above. Once they are created, you can perform Data Sync on your iPad or Android tablet by navigating to the Hike app > Settings > General > Data sync. You will be able to use the Floors and Kitchen Displays setup on your iPad/Android tablet as well.
We have created a new app for Kitchen Display for your iPad and Android tablets. You can download the app from the links below:
We have created a new app for Kitchen Display for your iPad and Android tablets. You can download the app from the links below:
Related Articles
Configure Customer Display
To improve the purchasing experience of your customers, you may want to show them what they are buying when you are adding the products in the order. Hike supports sharing order details with your customers on a second screen. As of now, the following ...Hot Keys: Quick Sale Layout
This new Quick Sale Layout feature is designed to streamline your point of sale (POS) experience. Now, you can easily add your best-selling products to this layout, ensuring they’re readily and easily accessible on the POS screen. This enhancement ...LED display for mPOP Drawer
The Power LED and Error LED will let you know the status of mPOP, for instance, if it is in normal standby, or if it is waiting for Bluetooth pairing to be performed, and also if an error occurs (for example if the printer is out of paper). For ...Hike all in one device/Hike POS device article.
Hike All-in-One POS: A Complete, Wire-Free Solution In this article: Overview & Key Benefits What's Included Technical Specifications Setting Up Your Device Connecting Peripherals Overview & Key Benefits The Hike All-in-One Hardware is a fully ...Setting up your Thermal Receipt Printers and Cash Drawers with Hike POS
Thermal Receipt Printers are a popular printing device for retailers around the world, to generate quick and efficient receipts for their customers. As a cost-effective solution, these thermal receipt printers have enhanced the way retailers do ...