Hike-eCommerce : Payment Types
Payment Types are a big part of your online business. These will be the options you provide to your customer to pay for the online orders.
Hike integrates with leading payment providers worldwide. Whichever option you decide to use, Hike makes it easy to set-up and by offering more payment options to your customers, you will also reduce your merchant fees with Hike. On this page, we’ll go through just how a Hike retailer will add a new Payment Type to their store.
Payment Types Overview
Before we look at how to how to add new Payment Types, let’s look at the Payment Types section in Hike, to give you an overview on what’s on the screen so that you can better familiarize yourself with it.
To begin, select Online Stores on the Hike menu and navigate to the Payment Types screen.
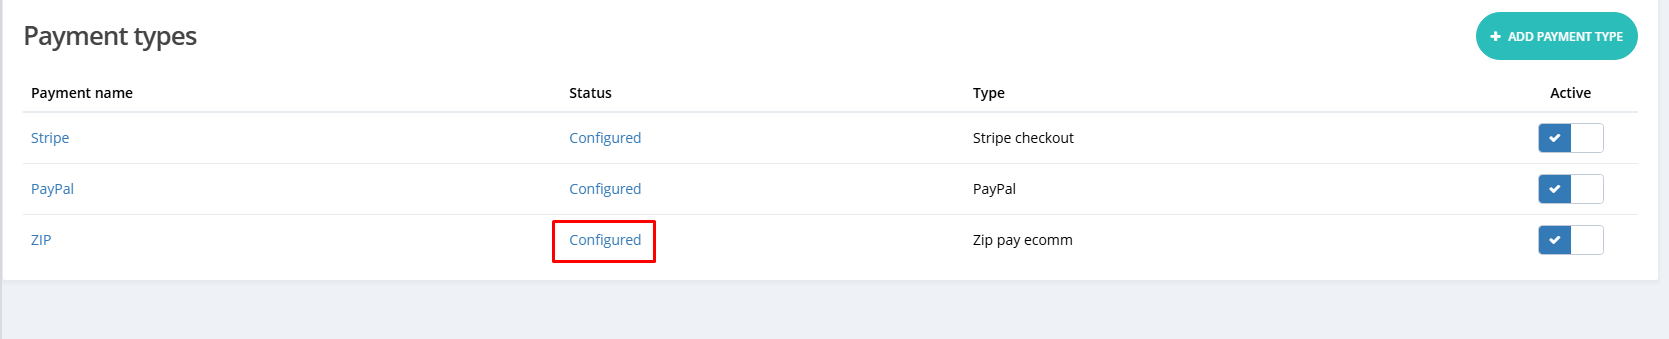
This is where you’ll find all your existing Payment Types, and where you’ll be able to create or edit new Payment Types, as per your requirements.
+ ADD PAYMENT TYPE
- Select +ADD PAYMENT TYPE to commence the steps to add another payment type.
- There is no restriction on the number of payment types that you can create, however, when you create a payment type, a new button will appear on the Payment page at the checkout, when your customer completes a payment.
- Payment Types List View: The Payment Types List View is in reference to the columns occupying the section. Below we’ll go through what each column means:
- Payment Name: The name of the payment method linked to the type.
Status
- This identifies whether the payment type is functioning in Hike.
- Configured – If shown, means that the payment type is functional
- Configuration Required – If shown, means that the payment type is not yet available.
- Typically, configuration required, will appear if integrating Tyro with a web-connection.
- You can click on the status line, to open the configuration settings.
Type
This column shows what type of payment this is, as you can have multiple payment methods but linked to certain payment types.
Active?
- This shows whether the payment type is currently active or not.
- Toggle the button to TICK to mark the payment type as active.
- Toggle the button to CROSS to mark the payment as inactive.
- The decision you make to have the payment type active or inactive, will be reflected amongst the Payment Type options that appear on the payment screen, when finalizing a sale from customer.
Hike currently provides 2 kinds of payments:
1. Integrated Payment Types.
2. COD & Pay in Store option
Let's talk about integrated payments provided by Hike eCommerce.
1. Zip Pay:
Zip
Pay integrates with Hike seamlessly. To start the integration, we will
have to add a new payment type and provide a name to it.
Here, please select a name for this payment type and select the Zip pay ecomm from the drop-down menu.
We have selected name ZIP here but you can have any name you wish.
Click on SAVE and a new payment type is ready to be configured.
Now, click on Configuration required and you will have the following slider open for API key.
You need to add the API key from ZIP account here.
Steps to Obtain Your API Key from ZIP account:
1. Log in to your Zip Merchant Dashboard.
2. Navigate to the Settings section.
3. Click on Integrations or Integration Details.
4. Here, you should find your merchant credentials, which typically include:
A Public Key or Unique ID (sometimes referred to as Client ID).
A Public Key or Unique ID (sometimes referred to as Client ID).
Copy that key and paste into the ZIP pay integration page on Hike and click on 'Configure'.
You will see the ZIP pay successfully configured if the API keys are correct.
You will be able to see ZIP payment at the Check-out page when making the payment for the online order.
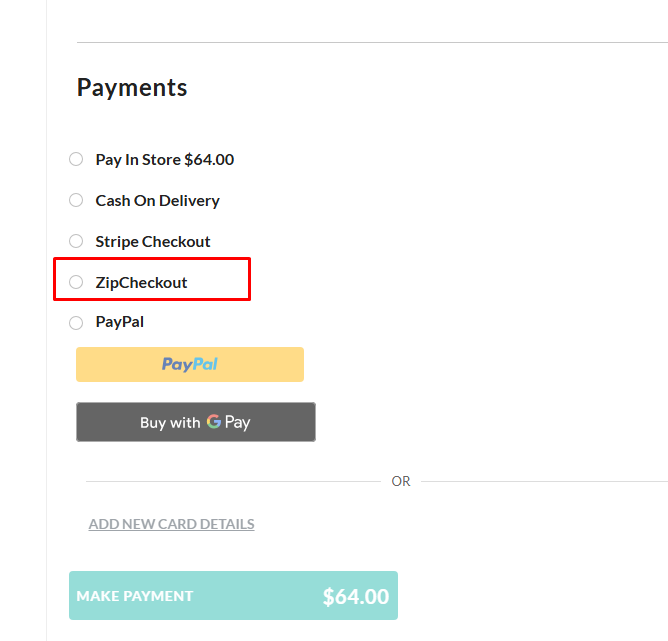
You will be able to see ZIP payment at the Check-out page when making the payment for the online order.
2. Stripe payment
To integrate Stripe with Hike eCommerce, please create a new payment type under eCommerce payments.
We have named it Stripe here and select the Stripe Check-out from the drop-down.

Once you save this, you will see a new payment type with Configuration required.

Click on Configuration required to start the configuration process between Hike eCommerce and Stripe.
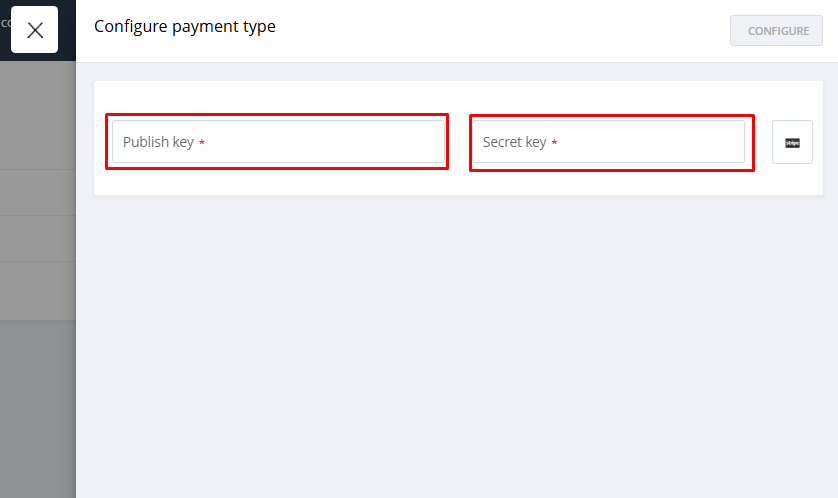
A new slider will open where you will need to enter Publish Key and Secret Key.
We have named it Stripe here and select the Stripe Check-out from the drop-down.
Once you save this, you will see a new payment type with Configuration required.
Click on Configuration required to start the configuration process between Hike eCommerce and Stripe.
A new slider will open where you will need to enter Publish Key and Secret Key.
- You can click on the configuration required link and add Publish key and secret key.Step-by-Step Guide on how to retrieve Publish key and Secret key
1. Log in to your Stripe account at https://dashboard.stripe.com/.
2. In the left-hand sidebar, click on the Developers menu item.
3. From the submenu that appears, select API keys.
4. On the API keys page, you will see both your Publishable key (starts withpk_...) and your Secret key (starts withsk_...).
5. To copy a key, click on the key value or the copy icon next to it

Once you add the Publish key and Secret key and click on Configure to complete the set-up.
When set up, the Stripe payment option will be available at the eCommerce check-out.
3. PayPal:
To check the detailed support article on how to integrate PayPal with Hike eCommerce, please check the support article.
https://help.hikeup.com/portal/en/kb/articles/using-paypal-as-integrated-payment-type-with-hike-ecommerce
https://help.hikeup.com/portal/en/kb/articles/using-paypal-as-integrated-payment-type-with-hike-ecommerce
Related Articles
Using Paypal as integrated payment type with Hike eCommerce.
Using Hike - Commerce - Paypal integration, you can streamline Payments, Boost Conversions, and Offer Global Flexibility. This guide provides step-by-step instructions for integrating PayPal with your Hike eCommerce store. Follow these professional ...Introduction to Hike ecommerce
Hike eCommerce: Your All-in-One Online Store Add-On for Hike POS Welcome to the future of unified retail! This help article will guide you through everything you need to know about Hike eCommerce, the powerful online store add-on that seamlessly ...Hike eCommerce : Preferences
A well-designed preference section on your e-commerce website can significantly improve user experience and efficiency for your team. It allows users to personalize their workspace, adjust settings to their liking, and optimize workflow. Here are ...Hike eCommerce : Themes
Industry-specific eCommerce themes pre-added to your platform can be a great way to get a head start on building your online store. These themes are designed for the unique needs and workflows of specific industries, saving you time and effort in ...How to integrate BigCommerce with Hike
Hike offers built-in integration with BigCommerce. Connect your Hike store with BigCommerce to seamlessly integrate your in-store Hike POS and BigCommerce eCommerce store. Integrating the two will give you complete management control of the data ...