Using Paypal as integrated payment type with Hike eCommerce.
Using Hike - Commerce - Paypal integration, you can streamline Payments, Boost Conversions, and Offer Global Flexibility.
This guide provides step-by-step instructions for integrating PayPal with your Hike eCommerce store. Follow these professional procedures to enable secure, one-click PayPal payments at checkout.
Prerequisites:
1. Active Hike eCommerce Store
2. Ensure your store is live with products/services configured.
3. PayPal Business Account with admin Access
4. You must have Owner or Admin privileges in Hike.
Now, let's start the integration process by enabling PayPal in the Hike eCommerce store.
Navigate to Online Store >> Payment Types.
Then click on the Add Payment Type option.
The Payment name should be as per your requirement and you can select the option : PayPal and click on SAVE.
Once done, you will be able to see the Payment type PayPal on the payment type with the Configuration required option.
When you click on the Configuration required here, a new window will open.
On this page, you can configure your PayPal account to accept payments from your online customers.
Here, on the page, you will need to use the PayPal email address to proceed.
Once you add the Email address for your PayPal account, click on CONNECT.
On the next page, you will need to enter your PayPal password, and the configuration will be completed. You will see below page when the password is correctly entered.
Please make sure you click on Return to Store here to complete the configuration.
Please note: If you close or refresh the above page and do not click on Return to Store option, the configuration will not work.
As the Configuration is Complete, let us see the settings.
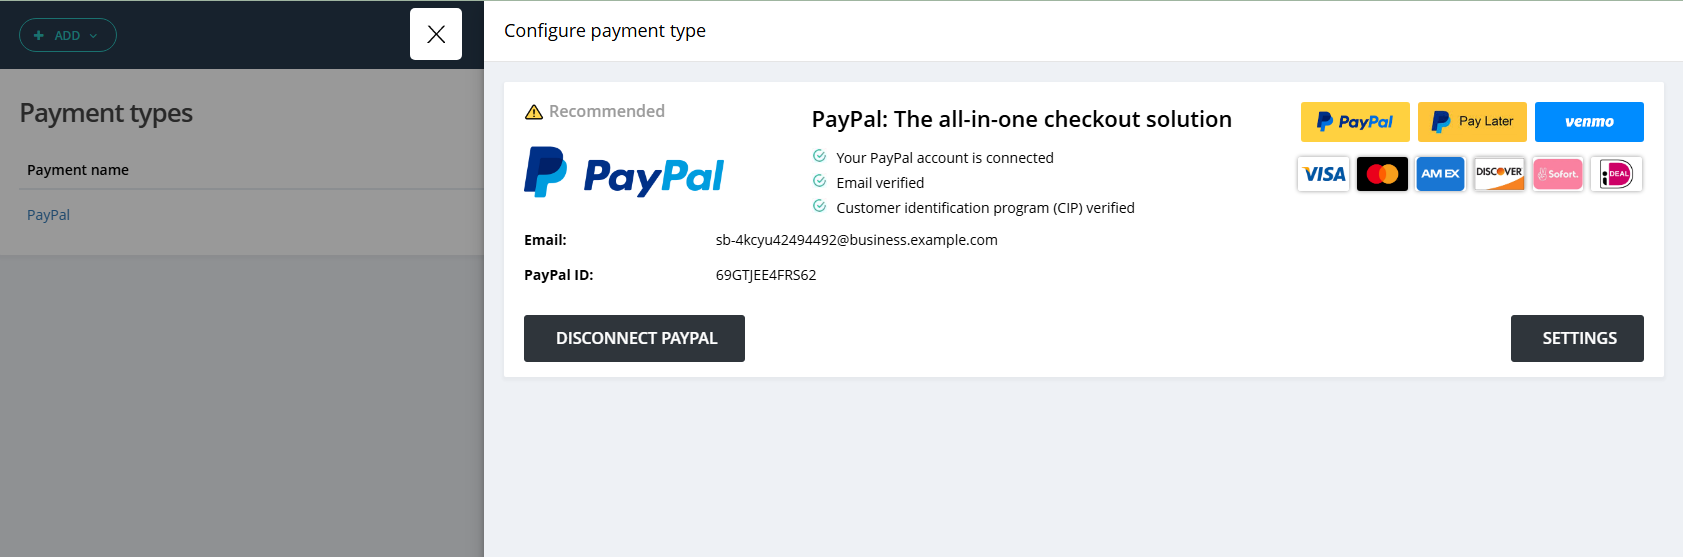
When you click on the Settings option here, you will see some options.

PayPal supports different options to make a payment for the end users.
Google Pay
Apple Pay
Venmo
Pay later
These options will be based on your location and devices. On this Settings page, you can select which options you wish to show on the Check-out page when making the payment.
If you select all options, the check-out page will look like this.
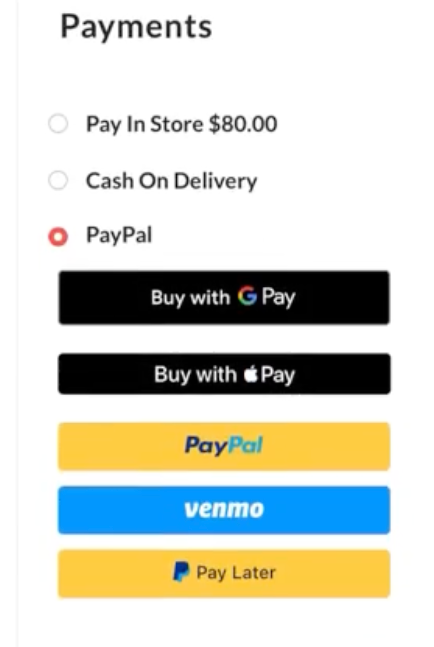
The end user will log into their own PayPal account to complete the payment.
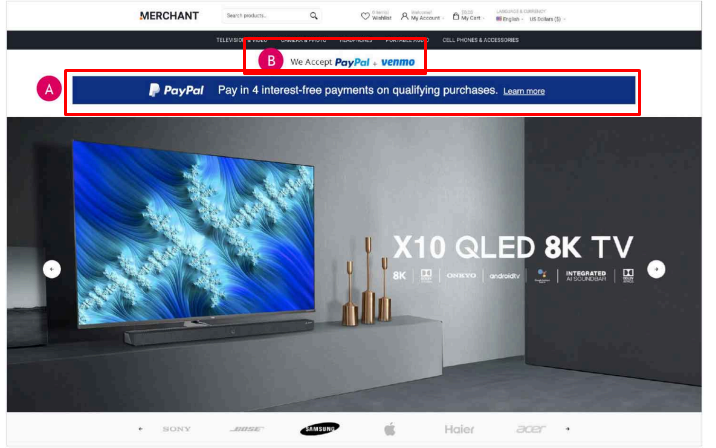
Show Pay later messaging.
This option will let you select the pages where you wish to show the Pay Later option for the check-out.
PayPal supports different options to make a payment for the end users.
Google Pay
Apple Pay
Venmo
Pay later
These options will be based on your location and devices. On this Settings page, you can select which options you wish to show on the Check-out page when making the payment.
If you select all options, the check-out page will look like this.
The end user will log into their own PayPal account to complete the payment.
Show Pay later messaging.
This option will let you select the pages where you wish to show the Pay Later option for the check-out.
A. Place the PayPal Pay Later messaging near a price point or call to action.
B. Feature PayPal checkout buttons near add to cart button using a vertical layout. Button size is at parity with all other payment methods
B. Feature PayPal checkout buttons near add to cart button using a vertical layout. Button size is at parity with all other payment methods
Related Articles
Hike-eCommerce : Payment Types
Payment Types are a big part of your online business. These will be the options you provide to your customer to pay for the online orders. Hike integrates with leading payment providers worldwide. Whichever option you decide to use, Hike makes it ...Hike eCommerce : Themes
Industry-specific eCommerce themes pre-added to your platform can be a great way to get a head start on building your online store. These themes are designed for the unique needs and workflows of specific industries, saving you time and effort in ...Tip: Cash out to a customer using Integrated payment type
In retail business sometimes there is a need to charge customer on their card/integrated payment type and give out the cash amount from the register. To make this possible, you will need to follow below steps on PC and iPad. Please note this is a ...Introduction to Hike ecommerce
Hike eCommerce: Your All-in-One Online Store Add-On for Hike POS Welcome to the future of unified retail! This help article will guide you through everything you need to know about Hike eCommerce, the powerful online store add-on that seamlessly ...Using different Payment Types with Hike POS
Hike POS is designed to be flexible, allowing you to accept payments in whatever way works best for your business. Whether you need a fully automated checkout or a manual recording method, Hike POS has you covered. This guide outlines the standard ...