Hike QR Pay (Scan & Pay)
Overview
Hike QR Pay is available in supported regions where HikePay is offered.
Before enabling Hike QR Pay, ensure that:
· Your Hike subscription includes the Hike QR Pay add-on.
· HikePay is activated for your store.
If HikePay has not been activated, Hike will prompt you to complete the HikePay signup process before enabling QR Pay.
Process a Sale
1. Create a sale in Hike POS.
2. Add products to the cart.
3. Proceed to the payment screen.
4. Select Hike QR Pay as the payment method.
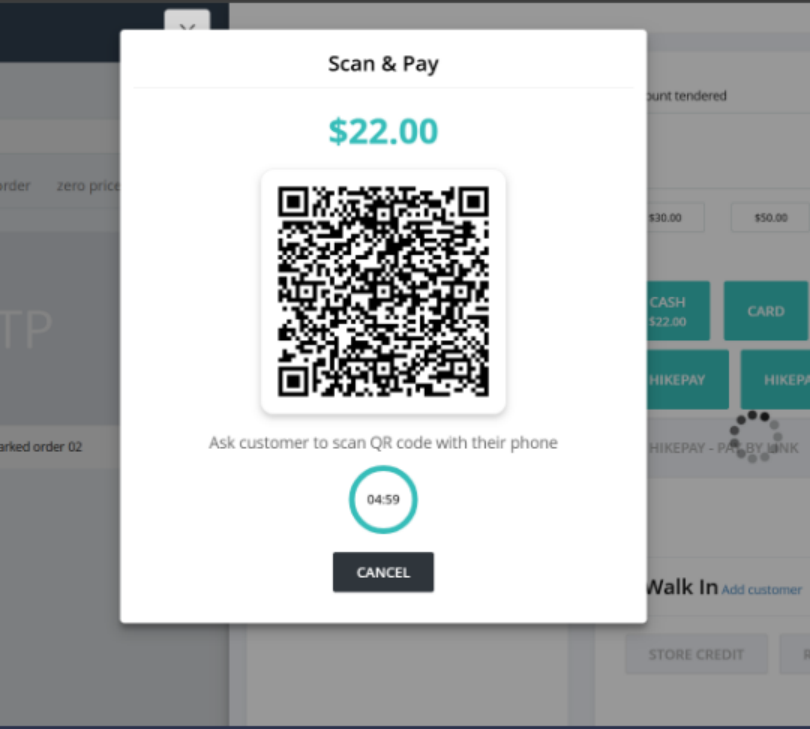
Generate QR Code:
When Hike QR Pay is selected:
1. A QR Code will appear on the payment screen.
2. A countdown timer is displayed.
3. Customers are prompted to scan the QR code using their mobile device.
Customer Scans QR Code
The customer:
1. Opens their phone camera.
2. Scans the QR code.
3. A secure payment page opens in their mobile browser.
Customer Completes Payment
Customers can pay using:
· Apple Pay
· Google Pay
· Any other Wallet apps
Supported payment methods depend on the customer's device and payment wallet availability.
Apple Pay
Apple Pay is only displayed on compatible Apple devices where Apple Pay has been configured.
Google Pay
Google Pay is displayed on supported Android devices with Google Pay configured.
Sale Completion
Once payment is successful:
1. Hike receives payment confirmation.
2. The payment status updates automatically.
3. The sale is completed.
4. Inventory is adjusted normally.
5. Payment details appear in reports and transaction history.
Partial Payment with QR Pay
Example:
· Sale Total: $100
· Customer Pays: $50 via QR Pay
· Remaining Balance: $50
Timer Functionality
A payment timer is displayed when the QR code is generated.
The timer:
· Prevents stale payment links.
· Automatically expires inactive QR sessions.
· Cancels unpaid QR transactions after timeout.
When the refund is processed for the sale paid by the QR scanning, the refund amount will be credited to the original bank account/card used for the payment.
Related Articles
How to configure Hike with Afterpay Barcode/QR
The Afterpay integration is supported on PC, Mac, iPad and Android tablets and is required for Afterpay's barcode/QR solution. This integration is supported in Australia and New Zealand. The instructions below is suitable for PC and Mac users. ...Hike Pay FAQ
In this article What is Hike Pay? Account Management Hardware Processing Transactions Reporting & Deposits Charge-backs PCI Compliance What is Hike Pay? Hike Pay is Hike Point of Sale's fully integrated payment processing solution. With Hike Pay, you ...Inventory Scan(X) App
The Inventory Scan(X) app is a dedicated inventory management application for Hike POS that enables you to efficiently manage your inventory from your Android device. Whether you're performing stock counts, receiving purchase orders, transferring ...Introducing the Hike Pay Plugin for WooCommerce
We are absolutely thrilled to announce the official launch of the Hike Pay Plugin for WooCommerce. We know that flexibility is key to converting sales. That is why we have built a seamless bridge between the Hike ecosystem and the world’s most ...Managing Terminal Settings & Features in Hike Pay
This article covers the configuration options available for your payment terminals within the Hike Pay dashboard. These settings allow you to control surcharges, pass-codes, and hardware functionality. Accessing Terminal Features: To configure these ...