Introducing the Hike Pay Plugin for WooCommerce
We are absolutely thrilled to announce the official launch of the Hike Pay Plugin for WooCommerce.
We know that flexibility is key to converting sales. That is why we have built a seamless bridge between the Hike ecosystem and the world’s most popular e-commerce platform. Merchants running their online stores on WooCommerce can now add Hike Pay as a secure, alternative payment option directly at checkout.
This integration ensures that your customers get more ways to pay, and you get to manage everything from the same Hike ecosystem you already know and trust.
Key Features:
- Seamless Checkout Integration: The plugin adds Hike Pay as a native payment gateway within your WooCommerce checkout page.
- Unified Management: Manage your transactions, settlements, and reporting directly from your existing Hike Merchant Dashboard.
- Security First: Leverages the same high-level encryption and security protocols that Hike Pay is known for.
- Customer Choice: Give your customers the freedom to pay using their preferred method within the Hike network.
Prerequisites
Before installing the plugin, please ensure you have the following:
1. A valid Hike Merchant Account (active and verified).
2. A WordPress site running WooCommerce (version 5.0 or higher recommended).
3. Administrative access to your WordPress dashboard.
Installation and Setup:
Currently, the Hike Pay Plugin is available exclusively via direct distribution. Please follow the steps below to get started:
Step 1: Download the Plugin
The plugin file is not yet available in the WordPress Plugin Directory. Please contact our Support Team directly to request the plugin download package.
- Support Email:support@hikeup.com
- Support Portal: Or contact us via 24/7 chat support.
Step 2: Install the Plugin
1. Navigate to your WordPress Admin Dashboard.
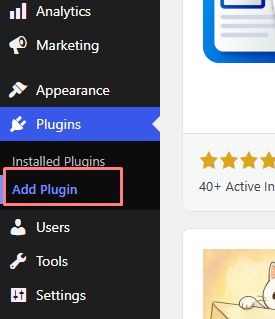
2. Go to Plugins > Add Plugin
3. Click the Upload Plugin button at the top of the page.
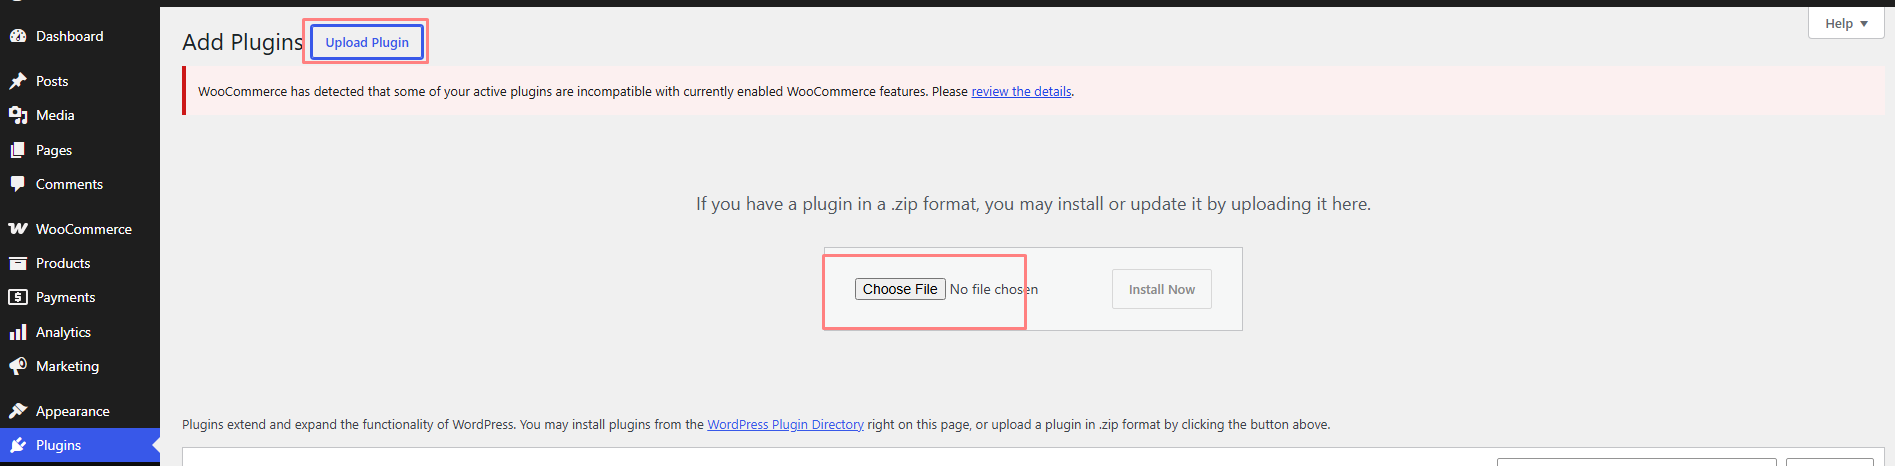
4. Choose the `.zip` file provided by the Support Team and click Install Now.
Step 3: Activate the Plugin
Once the installation is complete, click the Activate button.
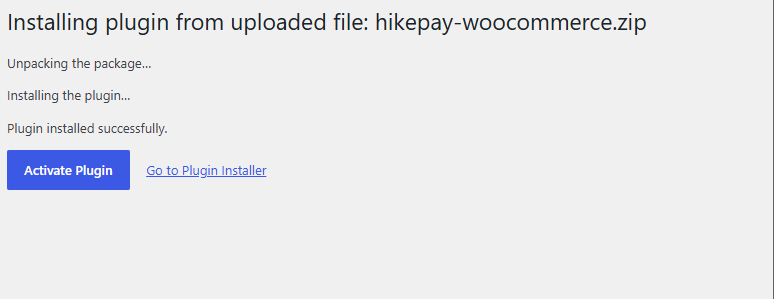
Step 4: Configure the Gateway
1. Once you click on Activate Plugin, you will get the option to configure Hike Pay with your WooCommerce.
Click on Let's Go on the Welcome page.
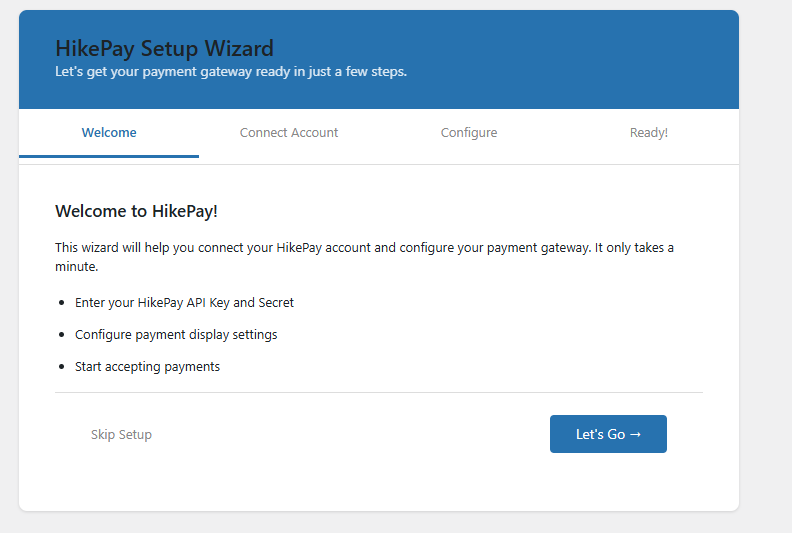
The next page will be Connect Account.
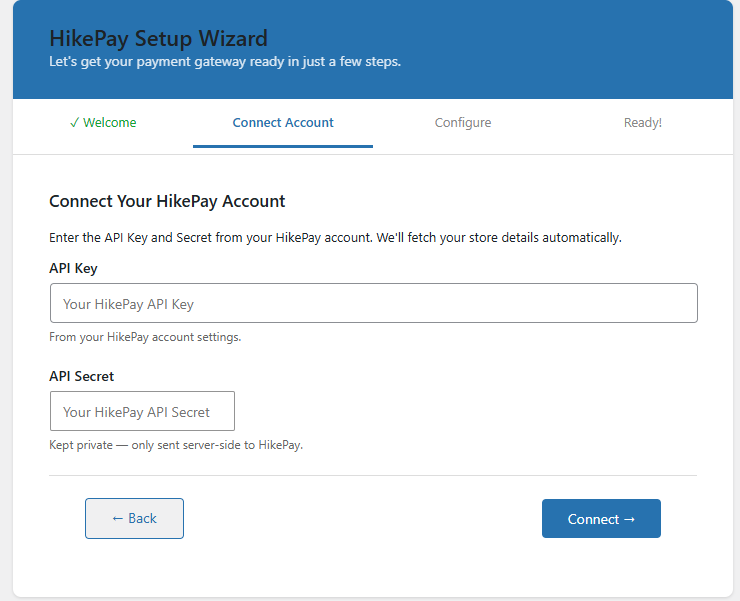
On this Configure page, please add the API key and API secret shared by the support team with the Zip file.
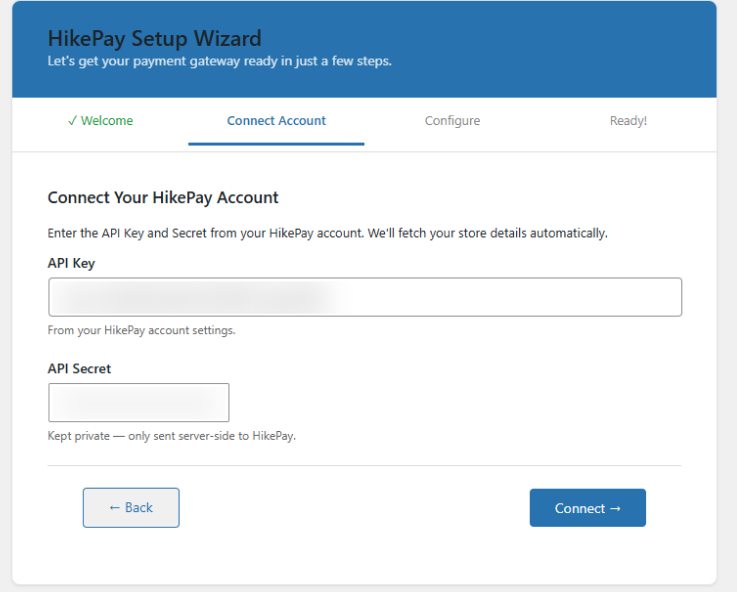
Click on the Connect tab.
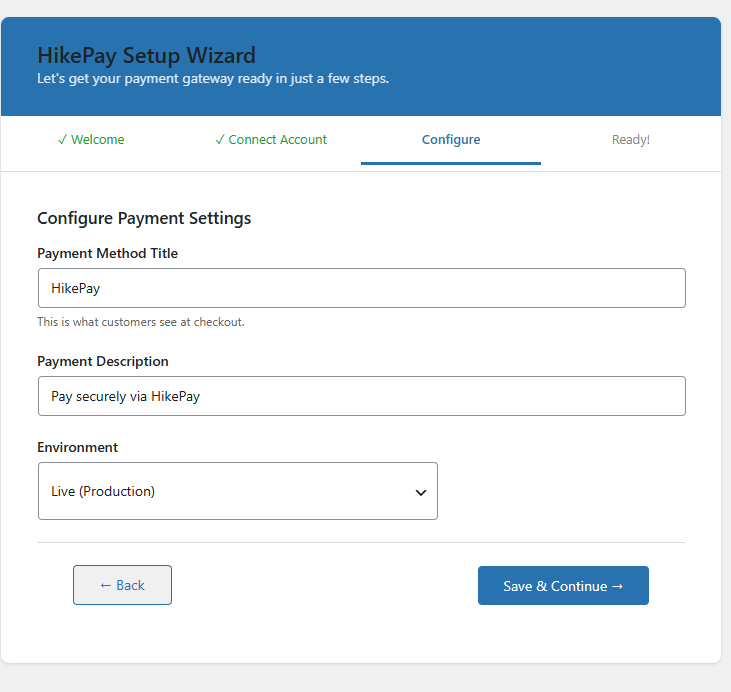
Under the Environment option, please select Live or Sandbox based on your requirement.
Click on Save and Continue, and your setup is completed.
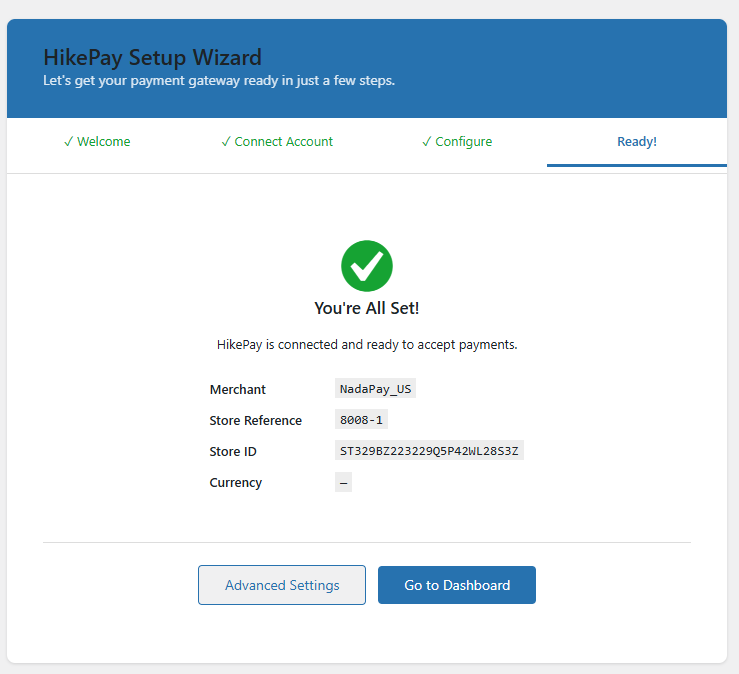
You are all set to use Hike pay with your WooCommerce store.
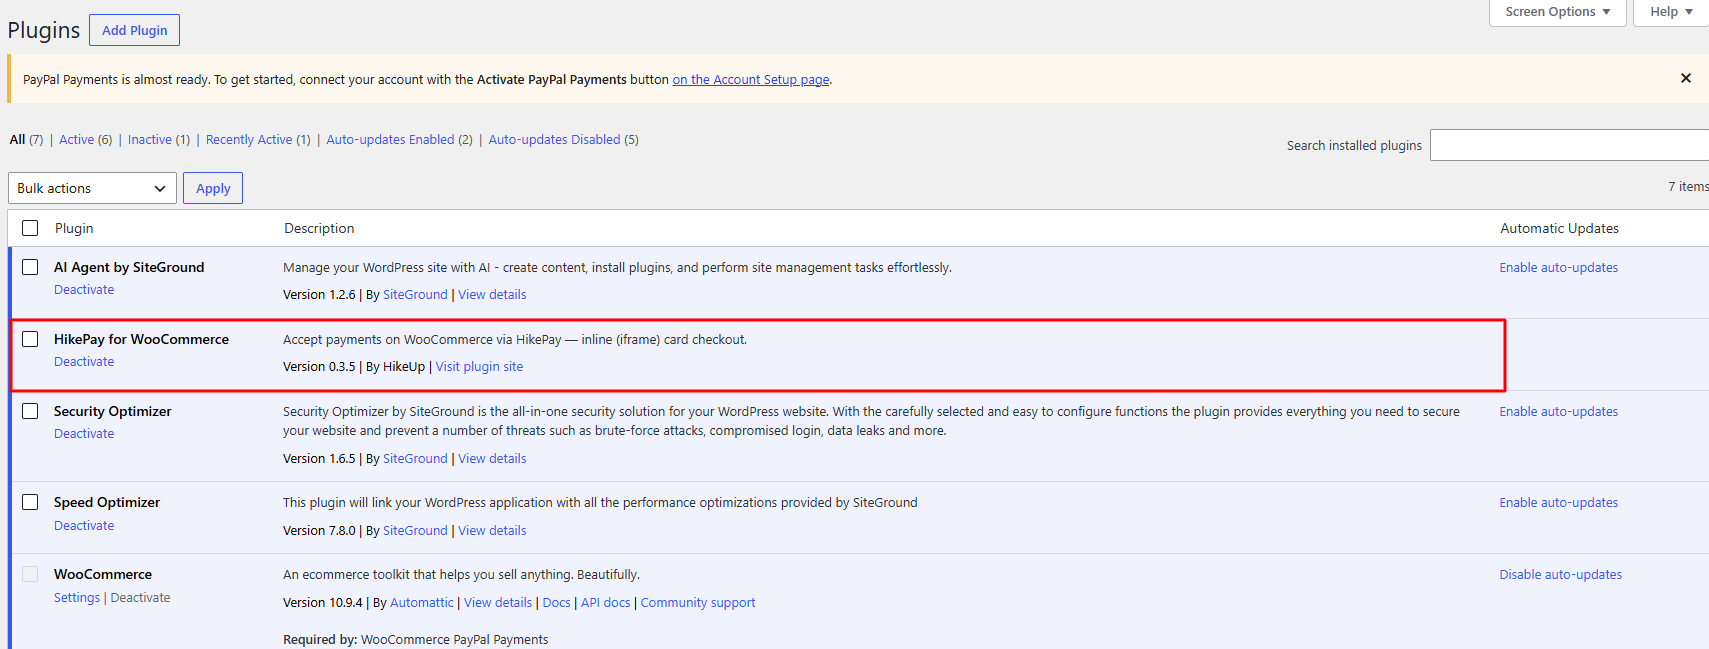
You will be able to see the Hike Pay plugin under the Plug in list.
How does this work on the WooCommerce payment page?
On the payment page, you will find the option to pay via Hike Pay once the plugin is active.
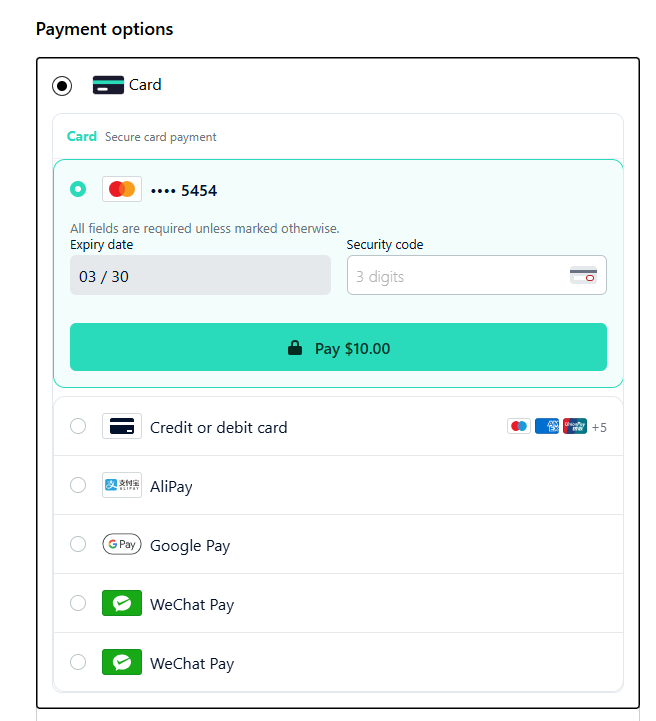
Please note: This screenshot could be different for you based on your WooCommerce theme selection.
All the payment types that are active with Hike Pay will be available in a list for selection.
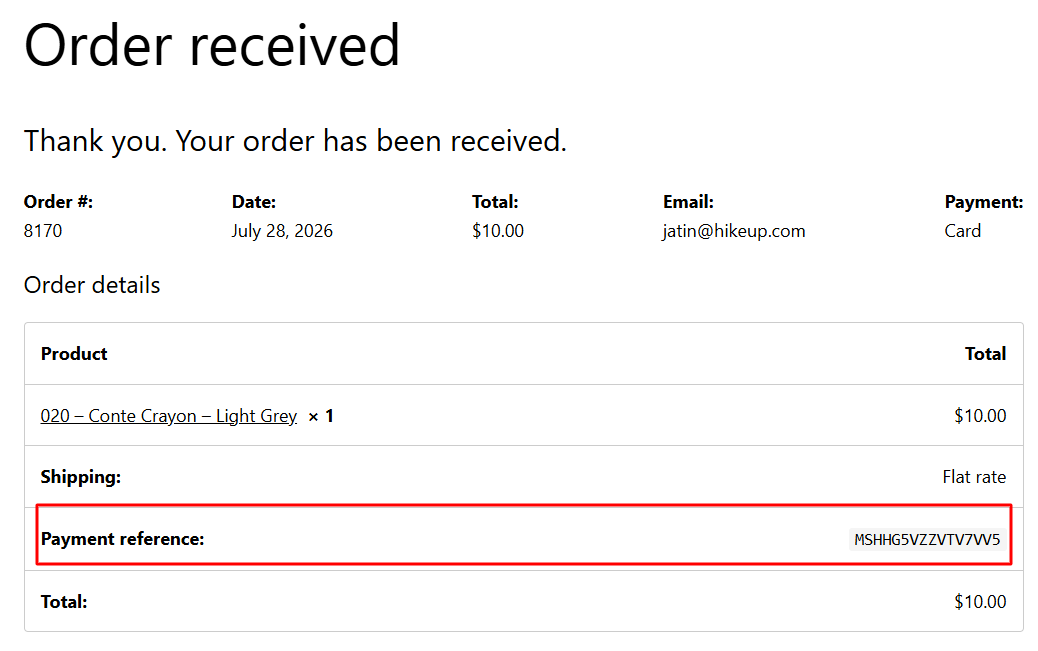
Once the payment is completed, you will find the Payment reference number in the order confirmation.
Frequently Asked Questions (FAQ)
Q: Is this plugin free?
A: The plugin itself is free to download and install. Standard Hike Pay transaction fees apply as per your merchant agreement.
Q: How do I get updates for the plugin?
A: Since this is a direct-distribution plugin, you will need to contact our Support Team for future updates or new version downloads.
Q: What if I need help with the setup?
A: Our support team is here to help! If you run into any issues during installation or configuration, please reach out to the team who provided you the download link.
We know that flexibility is key to converting sales. That is why we have built a seamless bridge between the Hike ecosystem and the world’s most popular e-commerce platform. Merchants running their online stores on WooCommerce can now add Hike Pay as a secure, alternative payment option directly at checkout.
This integration ensures that your customers get more ways to pay, and you get to manage everything from the same Hike ecosystem you already know and trust.
Key Features:
- Seamless Checkout Integration: The plugin adds Hike Pay as a native payment gateway within your WooCommerce checkout page.
- Unified Management: Manage your transactions, settlements, and reporting directly from your existing Hike Merchant Dashboard.
- Security First: Leverages the same high-level encryption and security protocols that Hike Pay is known for.
- Customer Choice: Give your customers the freedom to pay using their preferred method within the Hike network.
Prerequisites
Before installing the plugin, please ensure you have the following:
1. A valid Hike Merchant Account (active and verified).
2. A WordPress site running WooCommerce (version 5.0 or higher recommended).
3. Administrative access to your WordPress dashboard.
Installation and Setup:
Currently, the Hike Pay Plugin is available exclusively via direct distribution. Please follow the steps below to get started:
Step 1: Download the Plugin
The plugin file is not yet available in the WordPress Plugin Directory. Please contact our Support Team directly to request the plugin download package.
- Support Email:support@hikeup.com
- Support Portal: Or contact us via 24/7 chat support.
Step 2: Install the Plugin
1. Navigate to your WordPress Admin Dashboard.
2. Go to Plugins > Add Plugin
3. Click the Upload Plugin button at the top of the page.
4. Choose the `.zip` file provided by the Support Team and click Install Now.
Step 3: Activate the Plugin
Once the installation is complete, click the Activate button.
Step 4: Configure the Gateway
1. Once you click on Activate Plugin, you will get the option to configure Hike Pay with your WooCommerce.
Click on Let's Go on the Welcome page.
The next page will be Connect Account.
On this Configure page, please add the API key and API secret shared by the support team with the Zip file.
Click on the Connect tab.
Under the Environment option, please select Live or Sandbox based on your requirement.
Click on Save and Continue, and your setup is completed.
You are all set to use Hike pay with your WooCommerce store.
You will be able to see the Hike Pay plugin under the Plug in list.
How does this work on the WooCommerce payment page?
On the payment page, you will find the option to pay via Hike Pay once the plugin is active.
Please note: This screenshot could be different for you based on your WooCommerce theme selection.
All the payment types that are active with Hike Pay will be available in a list for selection.
Once the payment is completed, you will find the Payment reference number in the order confirmation.
Frequently Asked Questions (FAQ)
Q: Is this plugin free?
A: The plugin itself is free to download and install. Standard Hike Pay transaction fees apply as per your merchant agreement.
Q: How do I get updates for the plugin?
A: Since this is a direct-distribution plugin, you will need to contact our Support Team for future updates or new version downloads.
Q: What if I need help with the setup?
A: Our support team is here to help! If you run into any issues during installation or configuration, please reach out to the team who provided you the download link.