Creating & Completing Inventory Counts in Hike
Inventory counts (or stock takes, depending on where you live) are an essential part of any business – helping retailers keep track of their inventoryThe basic premise of an inventory count involves recording the quantity of each product in your store, and updating your inventory records thereafter. Once completed, the actual results are compared against the expected results, giving retailers a report of any discrepancies in their inventory.
Whilst previously a time extensive task, Hike POS has made the process so much more streamlined, and offers users a robust inventory management system, designed to give you the most accurate results.
- Inventory Count Types in Hike
- Performing a New Stock Count (All Inventory Count)
- Performing a New Stock Count (Specific Inventory Items)
- Deleting an Inventory Count
Inventory Count Types in Hike
Performing inventory counts in Hike can be done in two distinct ways:
- All Inventory Count: An all inventory count, is as described – a count of ALL items in your inventory, including those in the storeroom as well as shop floor. Usually performed at the end of the of the financial calendar, stores are generally closed (and it is highly recommended) during this period. This is to ensure that no items are sold, creating an imbalance in the counting and reporting.
- Specific Inventory Items: Also known as a partial count, this form of inventory counting refers to taking stock of ONLY A SPECIFIC set of items. A clothing store for example, may elect to only perform a specific inventory count on only all the jeans in the store. Retailers will generally perform regular partial counts during trading hours, and use a locking feature (as seen in Hike) to ensure the products being counted aren’t accidently sold.
Inventory counts are a great way in which to stay on top of all product movements in your store, and are a breeze to do with Hike POS’s built-in counting features.
Inventory Counting Overview
Before we look at how to how to create your own inventory counts, let’s look at the inventory count section in Hike, summarizing the points of interest for when you do create a count.
To begin, select Inventory on the Hike menu and navigate to the Count, Stocktake screen.
This is where you’ll find all your completed and pending inventory counts, and where you’ll be able to find and create counts, as per your requirements.
To search for a previous inventory count, simply enter the reference number in the search field.
Select +ADD NEW to create a new stock count – you can choose a partial or full count once you have clicked on this button.
Inventory Count Table
The Inventory Count Table is in reference to the columns occupying the Inventory Count section. Below we’ll go through what each column means:
Reference
The reference number of the Inventory Count.
Date
The date in which the inventory count was performed.
Outlet
The outlet from where the inventory count was/is taking place.
Status
Whether the Count is still ongoing – Pending – or whether it has been Completed.
To VIEW any of the inventory counts, simply click on its reference number. Whilst you will not be able to EDIT any Completed counts, you may for ones that are Pending.
Performing a New Stock Count (All Inventory Count)
Now it’s time to add your new stock count.
As mentioned at the top of the page, Hike offers retailers two options to perform stock counts:
- All Inventory Count
- Specific Inventory Items
In this section, we’ll cover how to perform All Inventory Counts. You can read all about how to perform stock counts for Specific Inventory Items here.
As you’ll be creating a full count, it’s important to note that these are usually done at the end of a financial year, or after a particularly busy season or even day – like Black Friday or Boxing Day sales.
Note: Before beginning your all inventory count, Hike recommends that your store is closed, as you will want to ensure that no stock is sold to customers, so as to avoid any unnecessary discrepancies, once the count has been completed.
Create an All Inventory Count
To begin, select Inventory on the Hike menu and navigate to the Count, Stocktake screen.
Select +ADD NEW to start a new inventory count.
Count Info
Once selected you will be taken to the New Inventory Count page, where you’ll be asked to enter details as follows:
Reference
Enter a Reference number to identify the inventory count as. Take note of your reference number as it will help you return to this Inventory Count.
Outlet
Select the outlet in which this inventory count will be taking place in.
Counted Inventory will be locked till the Stocktake is finalized.
This is a new feature in Hike, and it gives retailers the option to lock the products that will be counted if selected. This means that all items that are up for counting will be locked, so that those items will not be inadvertently sold and create avoidable discrepancies in your final reporting.
As this is an All Inventory Count it makes sense to ensure that this box is ticked – just to be safe, even if you do close your business while a full count is taking place.
Count Type
As this will be an All Inventory Count, select that option.
Select CONTINUE to proceed with the Stocktake.
Once you proceed to the next screen, you’ll encounter two sections, the first of which gives you an updated count info section.
Count Info Overview
Here, you’ll see the relevant details of the count that you are performing. These details cannot be changed.
Outlet
The outlet where the inventory count is taking place.
Reference
The reference number you gave to this count.
Count Type
What type of count you are conducting; Partial or Full Count.
Count Started On
The date and time in which the count was created.
Counted inventory will be locked till this Stocktake is finalized.
A yes or no, depending on what you selected on the previous screen.
Add items to an existing inventory count
You can add more item/s to an existing partial inventory count as long as the count is not yet complete.
Click on a ‘+ item to this count’ located above the count list. This will slide open a window where you can search and select items that are not already a part of the count.
Completing an Inventory Count
Here, we’ll walk you through the two ways in which retailers are able to perform their stock count on Hike:
- Manual Entry Count
- Barcode Scanning
Depending on how much you’re counting – and in this case, all of it – you’ll need to make sure you’ve prepared your inventory.
Undoubtedly, processes will vary from store to store but some helpful tips to ensure your inventory counting runs smoothly includes:
- Tidying your storeroom and shop floor so that no piece of stock is left unaccounted for.
- Ensure that all labels for products are properly attached, and print new ones for any missing.
- Check that your barcode scanners are working correctly – if you are counting via scanning.
Once you are sure you’re ready to go it’s time to start counting. Read on to see how to perform a Manual Count or Barcode Scan.
Manual Entry Count
Staying on the Count Info Overview page is a section below, which is where you’ll enter your count – in the To Be Counted field.
As this is an All Inventory Count, all your products will be automatically populated into the field. To perform a manual entry count all you’ll need to do is update the Actual column with the counted value, as you go.
Product Name
The name of the product you are counting
Expected
The current expected stock count for the product. This is based on the latest sales and inventory updates as per Hike POS.
Actual
The quantity value you will manually enter as per your actual counting during your stock take of that particular item.
Once you have entered in the Actual counted value of the product, click SET. The product and count will now appear in the Counted tab.
Barcode Scanner
Performing inventory counts with barcode scanners are a popular option with retailers, for its ease-of-use and faster counting times.
Getting started with your barcode scanner requires you to ensure your scanner is set-up and ready to go, making sure that it is connected via USB cable or Bluetooth to your PC, Mac or iPad, which ever device you are using Hike POS on.
Furthermore, make it easy on yourself and your staff, by having the barcodes of your products facing side-out for quicker scanning.
To begin, simply click on the SCAN BARCODE button.
There are 3 ways in which Hike will let users scan barcodes to perform an inventory count in Hike POS:
- Inventory
- Manual
- Automatic
Inventory
By selecting the Inventory tab, you can scan and save all your products’ barcodes into your scanner’s memory.
Note: To do this, you require a barcode scanner that offers ‘inventory mode’.
Simply proceed to scan each of the items you are taking stock of in your partial inventory count, and the Barcode field will automatically populate – with the barcode of each item.
Click SAVE once you have finished counting, and close the window to return to your Counting screen.
By selecting Manual tab (the default option when you open SCAN Barcode), once your scan a product, the product’s SKU, Name and Barcode number will appear in the Found Product section.
Once you have scanned in one item, click the OK button to scan your next item.
Once you have completed scanning all your items, click OK to save your progress, and click CANCEL or close the window to return to your Counting screen.
Automatic
By selecting the Automatic tab, you can quickly scan all your products and Hike will automatically store the data.
After each successful scan, a green DONE tick will appear.
Once you’ve finished scanning, you can close the window to return to your Counting screen.
Record Spoilage/lost items
Reviewing an Inventory Count
Once you have completed your counting – either by Manual Entry or Barcode Scanning – you will need to review your counted items.
To do this, click on the Counted tab to view and edit your stock counting of all your products.
From here you’ll see the full inventory count that you have just performed, with the Actual column populated with your counted stock.
The various columns on the Counted tab are as follows:
Product Name
The name of the product you have counted.
Expected
The expected count for your products – before the inventory count took place, based on the latest sales and inventory updates.
Actual
The quantity value that you have entered or has been picked up by the barcode scanner during your stock take for that particular item.
Note: By clicking on your Actual value you can change the amount.
Enter the new value and click TICK to update the changes, or CROSS to cancel changes.
Difference
The quantity difference between the actual stock count you have conducted and the expected stock count.
X
Click on the X button to remove the product from the Counted tab and return in to the To Be Counted tab. It will not be deleted.
This is useful if you find a discrepancy, but want to scan or manually count the products again.
Saving & Closing your Inventory Count
Once you have completed your inventory count – or just want to pause it for a while – Hike POS gives users two options to do either of those options.
- Click on the SAVE button to save the count as is, giving you the option to return to it at a later date. Your stock count can be resumed at any time and will appear as PENDING in the Inventory Count Table.
- Click the drop-down box and click on Mark as Complete if you have completed your stock count. You will not be able to edit anything following this, and your stock count will appear as COMPLETED in the Inventory Count Table.
Performing a New Stock Count (Specific Inventory Items)
We’ve established how to perform an All Inventory Count, it’s now time to learn just how to do a Specific Inventory Items count.
Specific Inventory Item counts (or Partial Counts) are generally a cyclical event, meaning that retailers perform that at regular intervals. As a way to minimize the laborious nature of full inventory counts, taking a bite-sized approached to your counting can be beneficial in staying on top of your inventory throughout the financial year.
One of the advantages of having a Specific Inventory Count, is that your stores do not need to be shut down for it. Simply turn on the locking feature to ensure that any stock that is being counted, cannot be sold over the counter to a customer. As always though, it’s important to keep track of where all your counted stock is.
Note: The only difference between creating an Specific Inventory Item count and an All Inventory Count, is the initial set-up screen. From there, the inventory counting process – whether manual entry or barcode scanned – is exactly the same.
Create a Specific Inventory Item Count
To begin, select Inventory on the Hike menu and navigate to the Count, Stocktake screen.
Select +ADD NEW to start a new inventory count.
Count Info
Once selected you will be taken to the New Inventory Count page, where you’ll be asked to enter details as follows:
Reference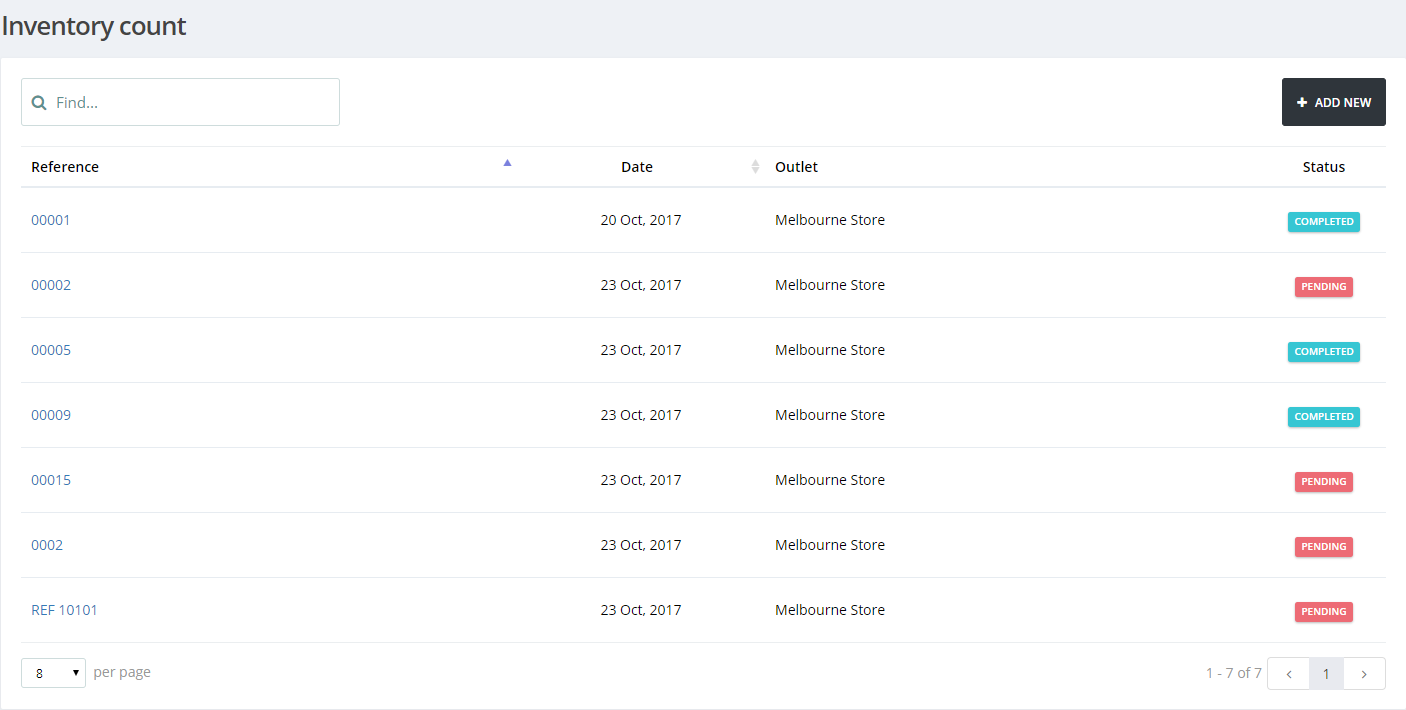
Enter a Reference number to identify the inventory count as. Take note of your reference number as it will help you return to this Inventory Count.
Outlet
Select the outlet in which this inventory count will be taking place in.
Counted Inventory will be locked till the Stocktake is finalized.
This is a new feature in Hike, and it gives retailers the option to lock the products that will be counted if selected. This means that all items that are up for counting will be locked, so that those items will not be inadvertently sold and create avoidable discrepancies in your final reporting.
As this is an All Inventory Count it makes sense to ensure that this box is ticked – just to be safe, even if you do close your business while a full count is taking place.
Count Type
As this will be an Specific Inventory Items count, select that option.
Filter by product, brand, product etc.
Next, you’ll need to select the products you will be counting using the search bar provided. Simply enter the name of the product and select the item/s you want using the drop-down box.
The products will then appear on the search bar itself. You can delete any items that you don’t want by clicking X.
Once you have the items you need, select CONTINUE.
From here, the processes to complete your Specific Inventory Items Count follows the exact same methodology as an All Inventory Count.
You can view those articles here:
Deleting an Inventory Count
There are no options in Hike POS to delete an Inventory Count.
A saved Inventory Count that has been marked as Completed, cannot be undone or reversed. The only option is to start a new count, but to ensure that it is specific the products that need counting.
Related Articles
Creating & Adding Products in Hike
Your products are the lifeblood of your business, for obvious reasons, and the need to ensure you add each new item into your point-of-sale correctly, is essential. From customizable product tags and descriptions, to setting up things like inventory ...Completing Sales in Hike
Creating and actioning sales in your point-of-sale system is just one part of the process. The other, is completing them once they have been finalized, either by the customer or the retailer. Such sales orders that need to be fulfilled at a time, ...Inventory Scan(X) App
The Inventory Scan(X) app is a dedicated inventory management application for Hike POS that enables you to efficiently manage your inventory from your Android device. Whether you're performing stock counts, receiving purchase orders, transferring ...Inventory scanner application by Hike
Hike has introduced Inventory scanner application which turns your iPad, iPhone or any Android device with a camera into a scanner. We understand that not every business owner has a scanner device. Here are the links to download this for iPhone and ...My Inventory
My Inventory page lists all the inventory you currently have. You can filter the results by Outlet name, or by Product name, SKU, bar-code, brand, product type, supplier, season and tag. Inventory table The table displays all products with the ...