Sell & Track Items With Serial Numbers
With Hike POS's Serial Number feature (Products > Serial Numbers), you can add serial numbers for specific products and record them on the POS screen when they are sold.
This feature empowers you to track which unit of a product is sold to each customer, ensuring that returns can be processed seamlessly with the correct unit returned.
For example, if you sell electronics, you may want to track the Serial Numbers for warranty. Similarly, if you sell mobile phones, you may want to record the associated EMEI number of each phone you sell.
1) Setting up Serial Numbers for products.
There are two ways Serial Numbers can be set up and used in your store:
1. From the Products page:
To add a Serial Number from the Products page, go to Products > Products > Add/Edit the product > Enable the below option:
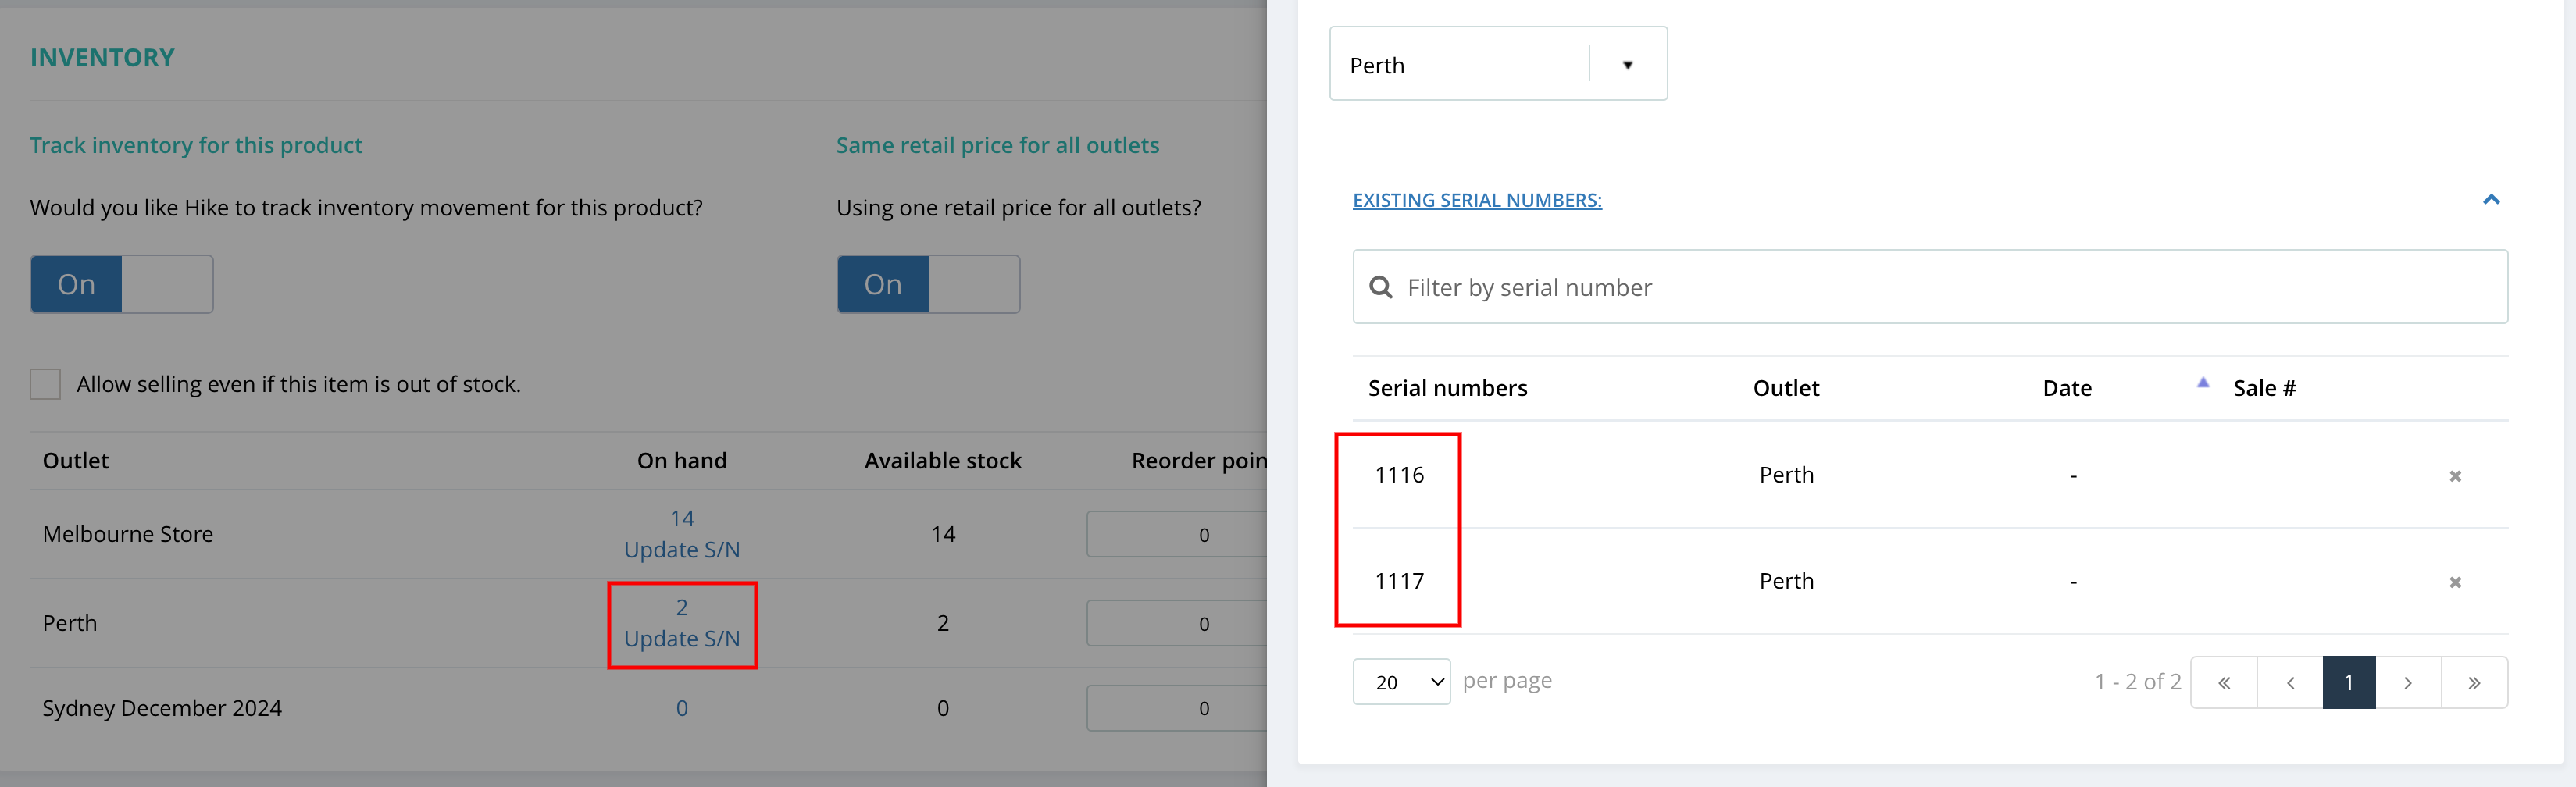
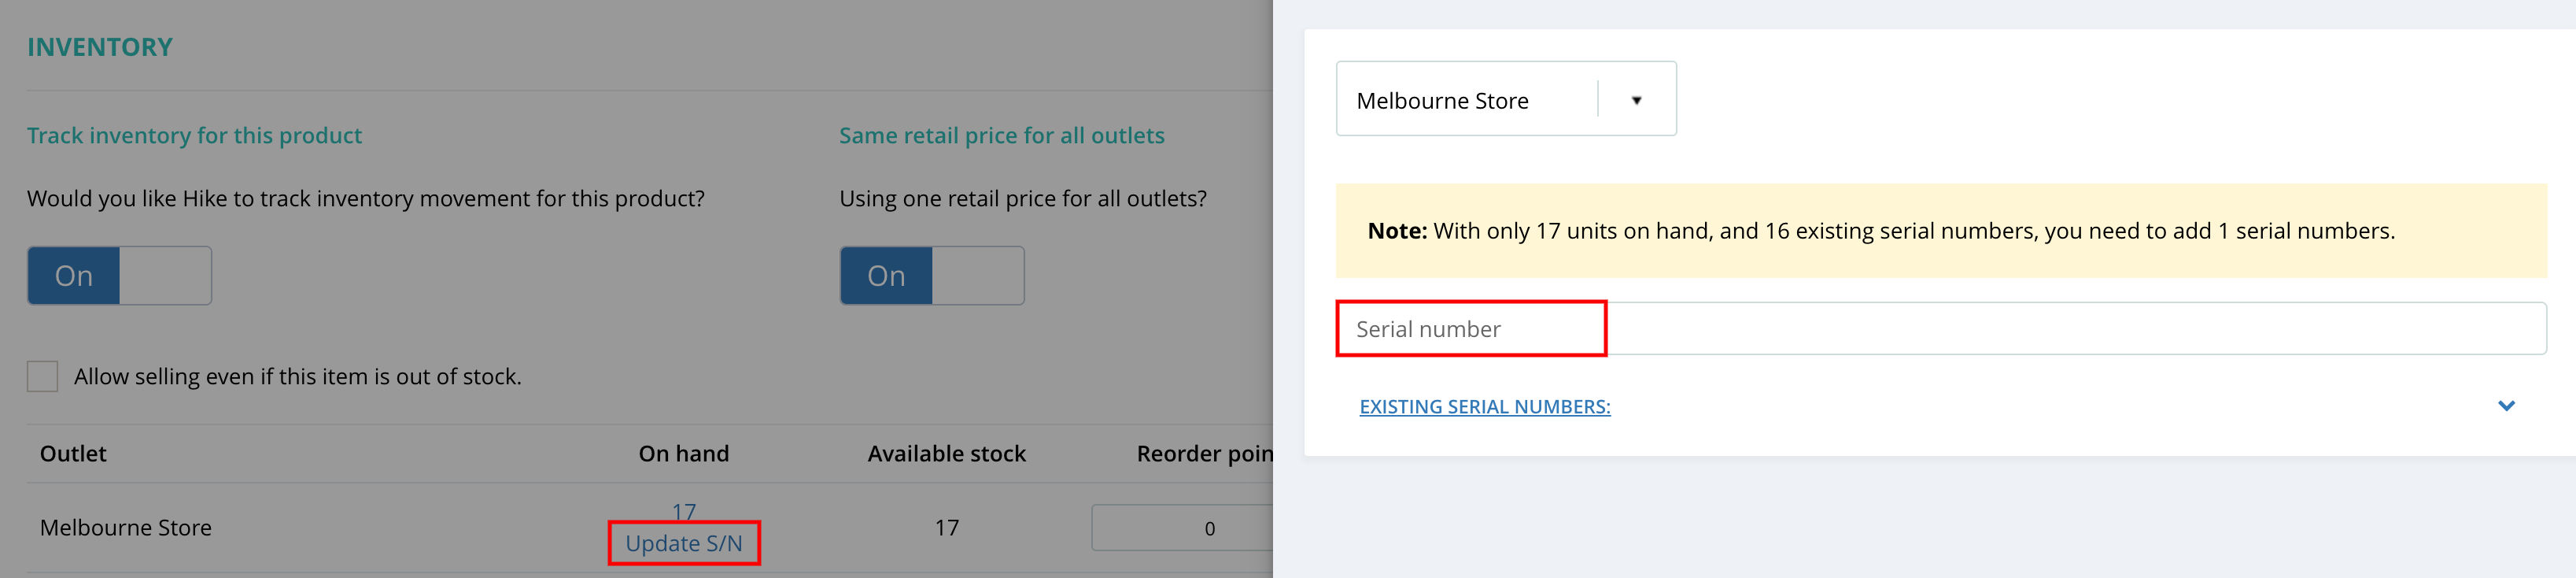
Once the above checkbox is selected, you can enter the Serial Number (S/N number) in the product’s inventory section. You can click on that to enter the serial numbers.
2. From Serial Numbers page (Products > Serial Numbers):
To ensure Serial Numbers are easily recorded and tracked, Serial Numbers are found under Products > Serial Numbers. Here you can record new Serial Numbers for your products. Follow the steps below:
1. Navigate to Products > Serial Numbers.
2. Click Add Serial Numbers.
3. Enter and select the product name for which you're recording Serial Numbers in the Product field.
4. Select the outlet these Serial Numbers will be located at in the Outlet field.
5. Enter each Serial Number in the Serial Numbers field and add them.
6. Once all Serial Numbers have been entered, click SAVE.
Each Serial Number you have added will now appear as an individual line on the Serial Numbers page.
2) Recording Serial Numbers on the Sell screen.
When selling a product that has serial numbers recorded against it at the specific outlet, cashiers will be prompted to enter the Serial Number to confirm it is available to sell.
Cashier can enter the Serial Number in the cart to proceed ahead with completing the sale.
If the cashier enters an invalid Serial Number, then the system will pop up the below error message:
3) Tracking sales of products with Serial Numbers.
You can track which Serial Numbers have been sold on the Serial Number page (Products > Serial Numbers). On each Serial Number line, sale information will be recorded in the Date of Sale column.
This sale information will display the sale date and time, as well as a direct link to the sale in the Sales history.
Each Serial Number will remain on the Serial Number page until it is deleted from this page.
4) Disabling Serial Numbers for individual products.
Once a Serial Number has been recorded against a product, or the Has Serial Number setting has been turned on in the Edit product page, the cashier will be prompted to enter a Serial Number each time the product is sold.
If you no longer wish to record Serial Numbers at the time of sale then, navigate to Products > Open the product in which you want to disable the Serial Number > Uncheck the below checkbox > Save the product.
Any Serial Numbers (sold or unsold) recorded against the product on the Serial Numbers page will remain regardless of whether Serial Numbers are enabled or disabled.
Serial Numbers are unique to each individual unit and are therefore separate from SKU codes.
5) How to add Serial Numbers when receiving items through purchase orders.
When receiving stock via a purchase order, you can easily add or record Serial Numbers at the time of receipt. Follow the steps below to ensure your stock is accurately documented:
1. Navigate to Inventory > Purchases > Add New.
2. Search for the product you wish to add and include it in the purchase order.
3. Save the purchase order.
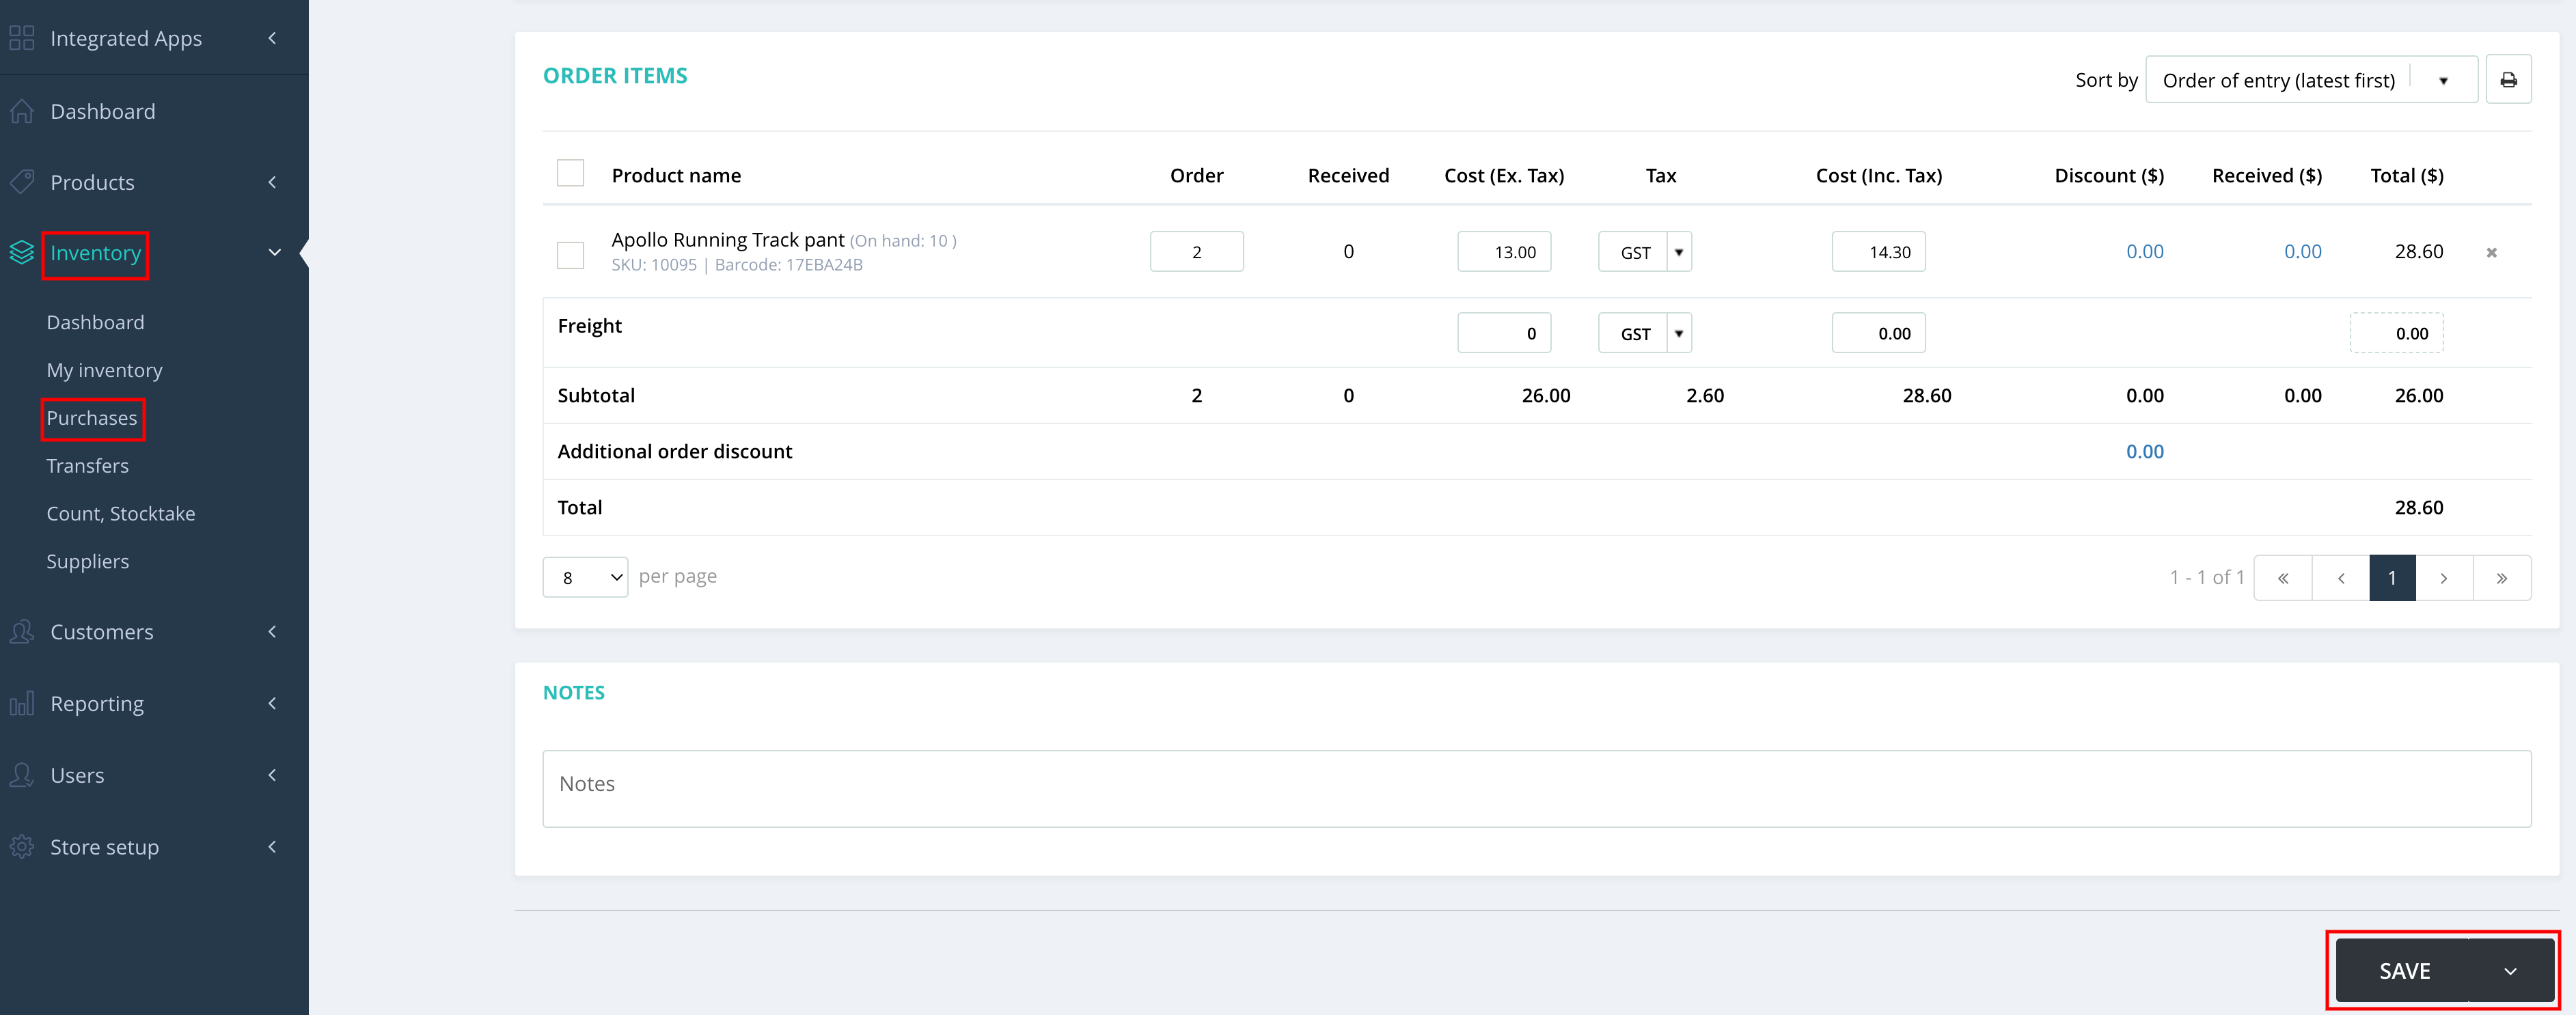
4. Access the saved purchase order via Inventory > Purchases.

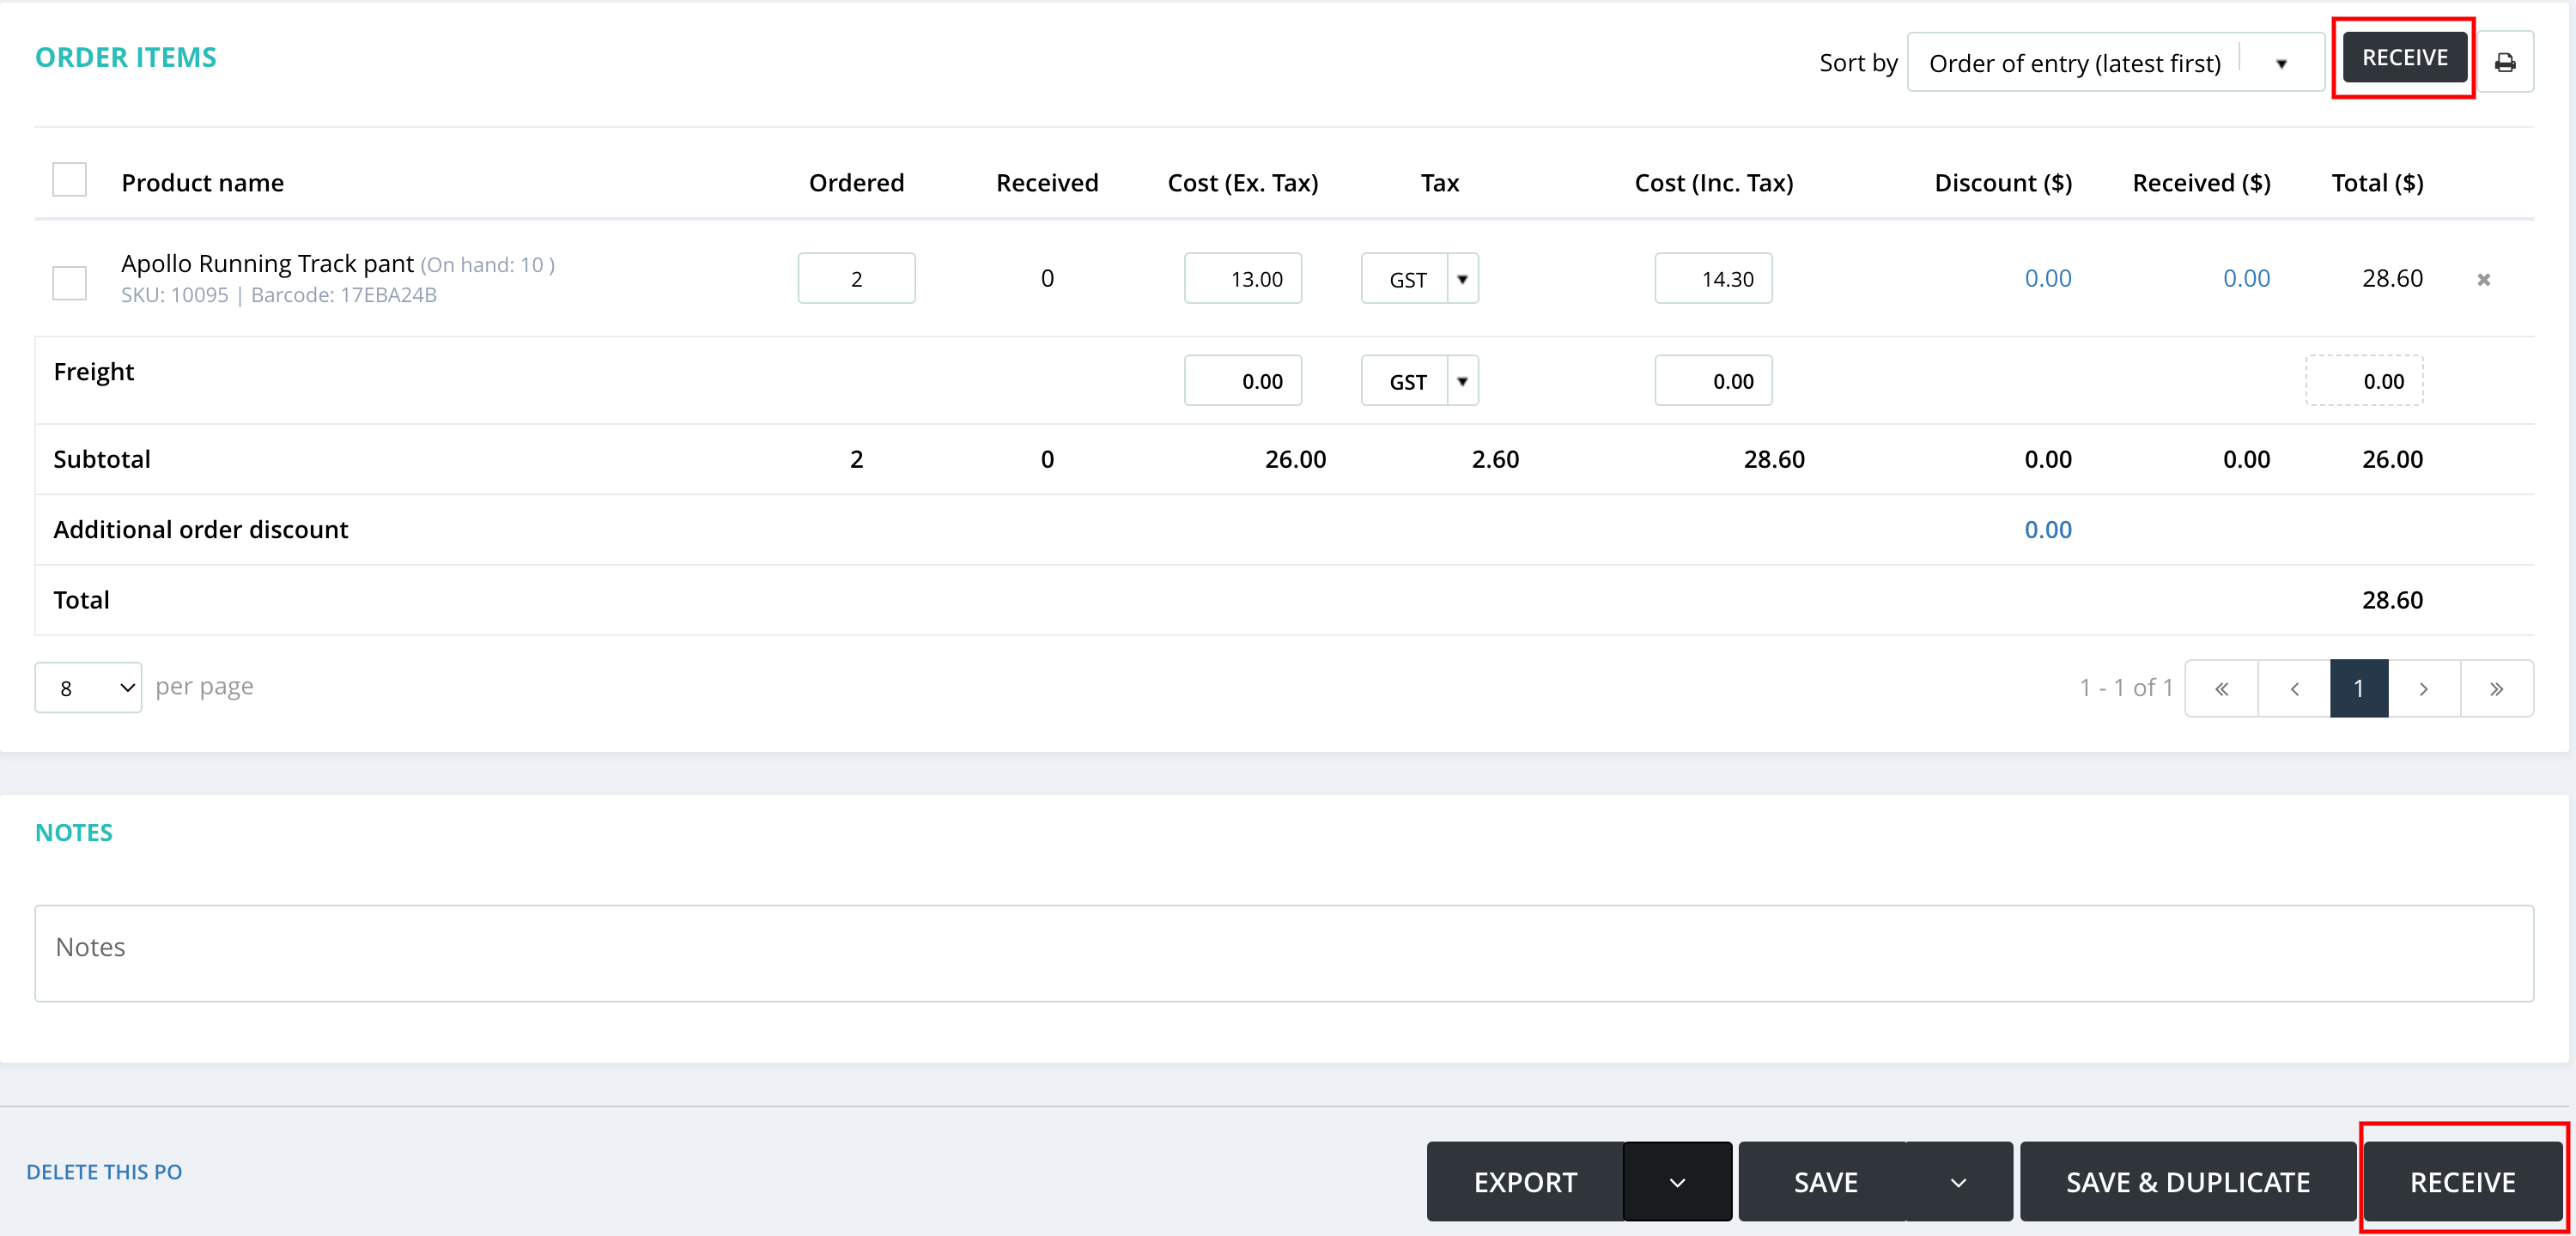
5. Click on the RECEIVE button.
4. Access the saved purchase order via Inventory > Purchases.
5. Click on the RECEIVE button.
6. Enter the quantity of stock received in the Receive box, then click on RECEIVE NOW.
7. A new slider will appear, allowing you to add or record Serial Numbers for the received stock.
8. After entering the Serial Numbers, click SAVE to finalize your updates.
Once saved, the Serial Numbers will be reflected on the product page for this specific item.
Important note: If the purchase order is deleted or if it is returned, you will need to remove the Serial Numbers of the products manually from the products page.
6) How to add Serial Numbers when transferring stock from one outlet to another.
When transferring stock via a stock transfer, you can easily transfer the products from one outlet to another along with their Serial Number. Follow the steps below to ensure your stock transfer is accurately documented:
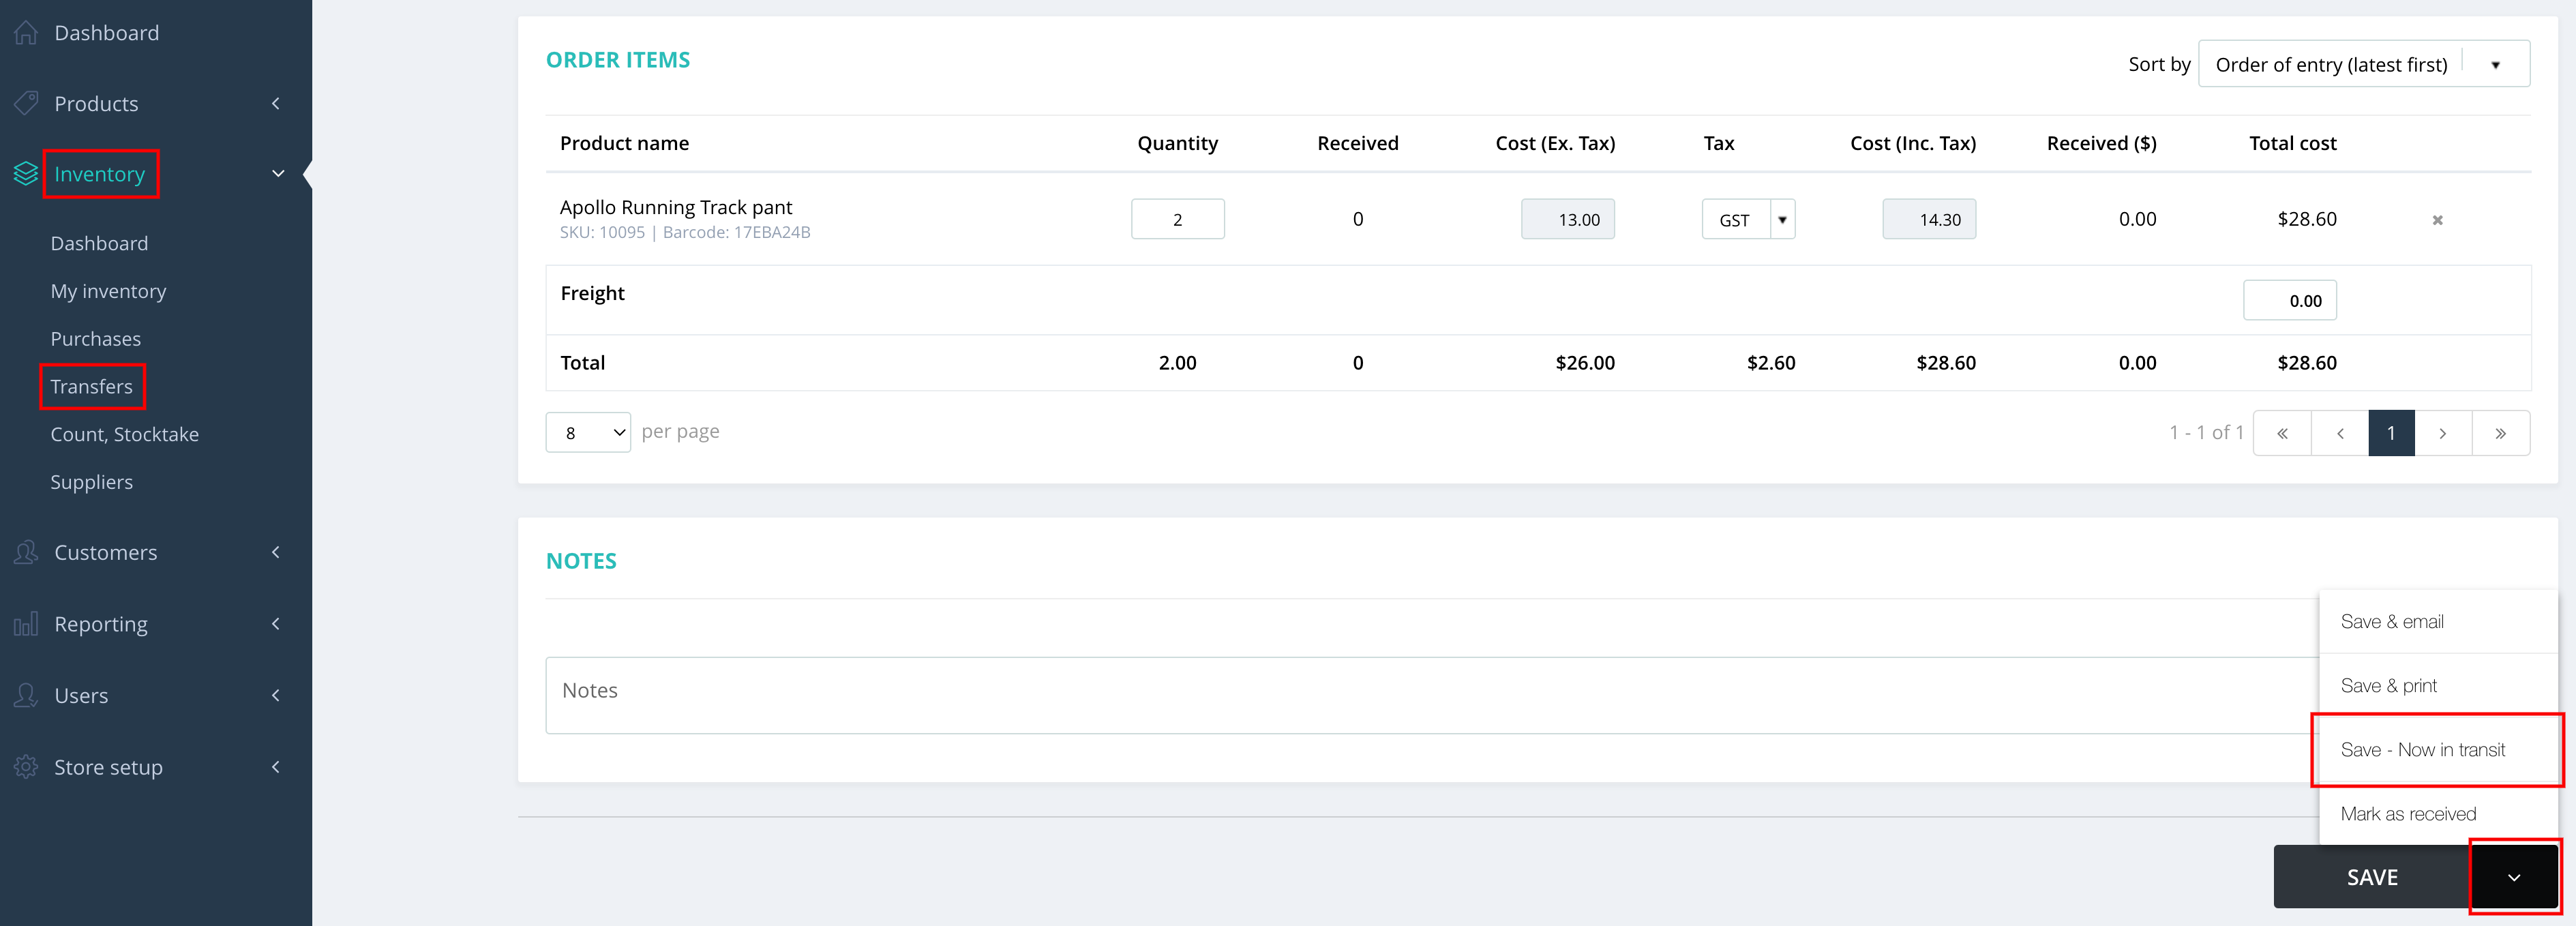
1. Navigate to Inventory > Transfers > Add New.
2. Select the Source and Destination outlet.
3. Search for the product you wish to include in the transfer.
4. Save the transfer as Save - Now in Transit.
5. Access the In-Transit transfer via Inventory > Transfers.

5. Access the In-Transit transfer via Inventory > Transfers.
6. Click on the RECEIVE button.

7. Click on Update S/N button.

8. A new slider will appear, allowing you to add or record Serial Numbers for the transfer stock.
9. After entering the Serial Numbers, click SAVE to finalize your updates.
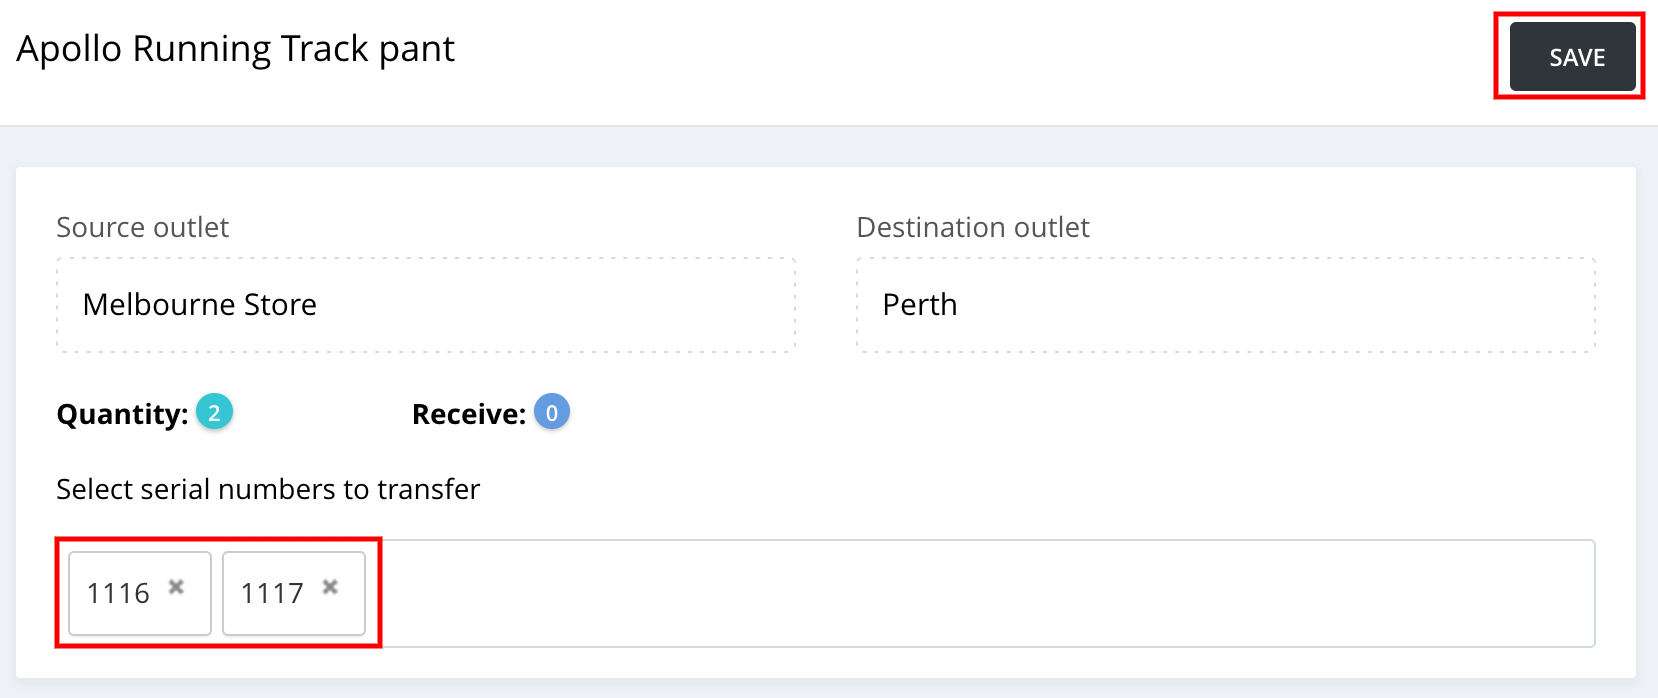
Once saved, the Serial Numbers will be reflected in the associated outlets on the product page for this specific item.
Important note: If the transfer is deleted, the stock from the destination outlet will be removed and will be added to the source outlet. However, you will need to add the Serial Numbers to the products manually in the source outlet from the products page.
7. Click on Update S/N button.
8. A new slider will appear, allowing you to add or record Serial Numbers for the transfer stock.
9. After entering the Serial Numbers, click SAVE to finalize your updates.
Once saved, the Serial Numbers will be reflected in the associated outlets on the product page for this specific item.
Important note: If the transfer is deleted, the stock from the destination outlet will be removed and will be added to the source outlet. However, you will need to add the Serial Numbers to the products manually in the source outlet from the products page.
7) How to add Serial Numbers when performing Stocktake.
Stocktakes are essential to any business – helping retailers keep track of their inventory. The fundamental process of an inventory count involves recording the quantity of each product in your store and updating your inventory records thereafter. Once completed, the actual results are compared against the expected results, giving retailers a report of any discrepancies in their inventory.
Follow the below steps to create a new stocktake for the items with Serial Numbers enabled:
1. Navigate to Inventory > Count, Stocktake > Add New.
2. Search for the specific products to add to the stocktake or create it for all inventory.
3. Click on the CONTINUE button.
4. Count the physical stock, update it in the ACTUAL field, and click on SET.
5. The system will show you the below message if the counted stock has Serial Number enabled.
Once the count is finished in the stocktake, You can mark it as complete and then go to this specific product from the products page and add or record the Serial Number manually.
Once the count is finished in the stocktake, You can mark it as complete and then go to this specific product from the products page and add or record the Serial Number manually.
Related Articles
Sorting Items In A Purchase Order
Hike allows you to sort the items added in a purchase order. In this way, locating a product in a purchase order is much easier. For a detailed explanation of how to add items into a purchase order, please refer to, "What is a Stock Purchase Order?" ...Why do I sometimes see duplicate receipt numbers?
With speed and reliability in mind, when you open a register on your computer, Hike will pre-fetch the receipt number from our servers and put it aside for your next sale. The receipt number is saved locally on your device. However, if a sale is not ...Unit of Measure: Sell or Purchase Same Products in different quantities
Hike now allows you to procure your products and sell them either as a box/bundle or individually. For instance, you may want to buy a crate of beer bottles and then sell the entire crate or a single beer bottle to your customers. Note: Unit of ...Editing SKU Numbers When They Appear as Scientific Notations in Excel
A common issue that occurs when importing SKU numbers in Microsoft Excel, is that they can appear in their scientific, ‘truncated’, notation when they are either long digit numbers or with ‘0’. Important: If this occurs on your SKU file when you go ...Tips: How to Divide Payments By Tags of Line Items in An Order
In some industries, customers may require to pay different types of products with different payment types. If it sounds like your business, you can do it with a few clicks in Hike. First, you will need to enable the feature in your Hike store. To do ...