How To Manage Rosters
The Rosters section allows you to plan when your staff will be working, and provide a printout for them.
The times that staff are rostered is a guide only, and they can still log in if they come early or leave later than rostered, however the staff cannot be rostered to work after the store is closed.
In this guide we will look at the different sections on the roster:
Usual Hours Template:
By clicking on this option, you will be able to set-up the usual hours for your business and add users into the roster.
Here, you can set the hours for your business, set-up the user and when save, the details will be available on the Roster page.
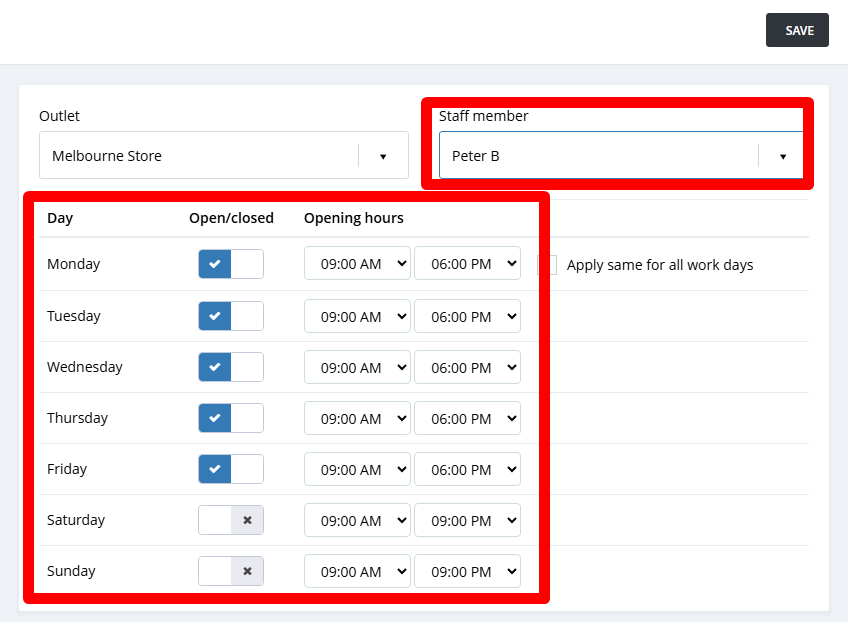
You can add multiple staff members in the roster from same page as above.
Here, you can set the hours for your business, set-up the user and when save, the details will be available on the Roster page.
You can add multiple staff members in the roster from same page as above.
Setting usual hours for the users:
You can apply the working hours for each user individually or apply set usual hours for all users by one click.
From the Previous week and Next week options on the top of the page, you can apply the same hours for the user in multiple weeks.
You can apply the working hours for each user individually or apply set usual hours for all users by one click.
From the Previous week and Next week options on the top of the page, you can apply the same hours for the user in multiple weeks.
This will be helpful if you are setting up the roster for entire month.
Choose outlet drop down list
A drop down list to choose your outlet, if you have more than one, that you see on screen
Previous week, date, next week
Can click to display the previous week on screen, next week on screen, or any particular date.
Print
Opens a window where you can choose to print the roster from a number of options
Roster notes:
You can also add notes directly when creating or editing the roster —making it easier than ever to communicate important shift details.
Whether it's special instructions, reminders, or any additional context, these notes ensure your team is always in the loop.
When a note is added to a shift, a note icon will appear on the roster.
You can simply hover over the icon to view the full note—no need to click or open anything.